
Slider Revolution is arguably one of the most popular WordPress slider plugins and offers many advanced features to build complex sliders, even single page websites. Although it may sound appealing, on the downside you might end up spending hours to figure out how to build a simple slider due to complicated settings and options.
As a beginner the most common difficulties you may encounter are correct navigation settings, image overflow issues, image alignment issues, adding captions etc. This tutorial focuses on these problems and aims to cover all basics .
* Find the demo file end of this post
Step A – Create a New Slider with Slider Revolution
Go to Slider Revolution menu from admin dashboard and click (+) New Slider button. This action takes you to Slider Settings page where you can adjust global slider settings.
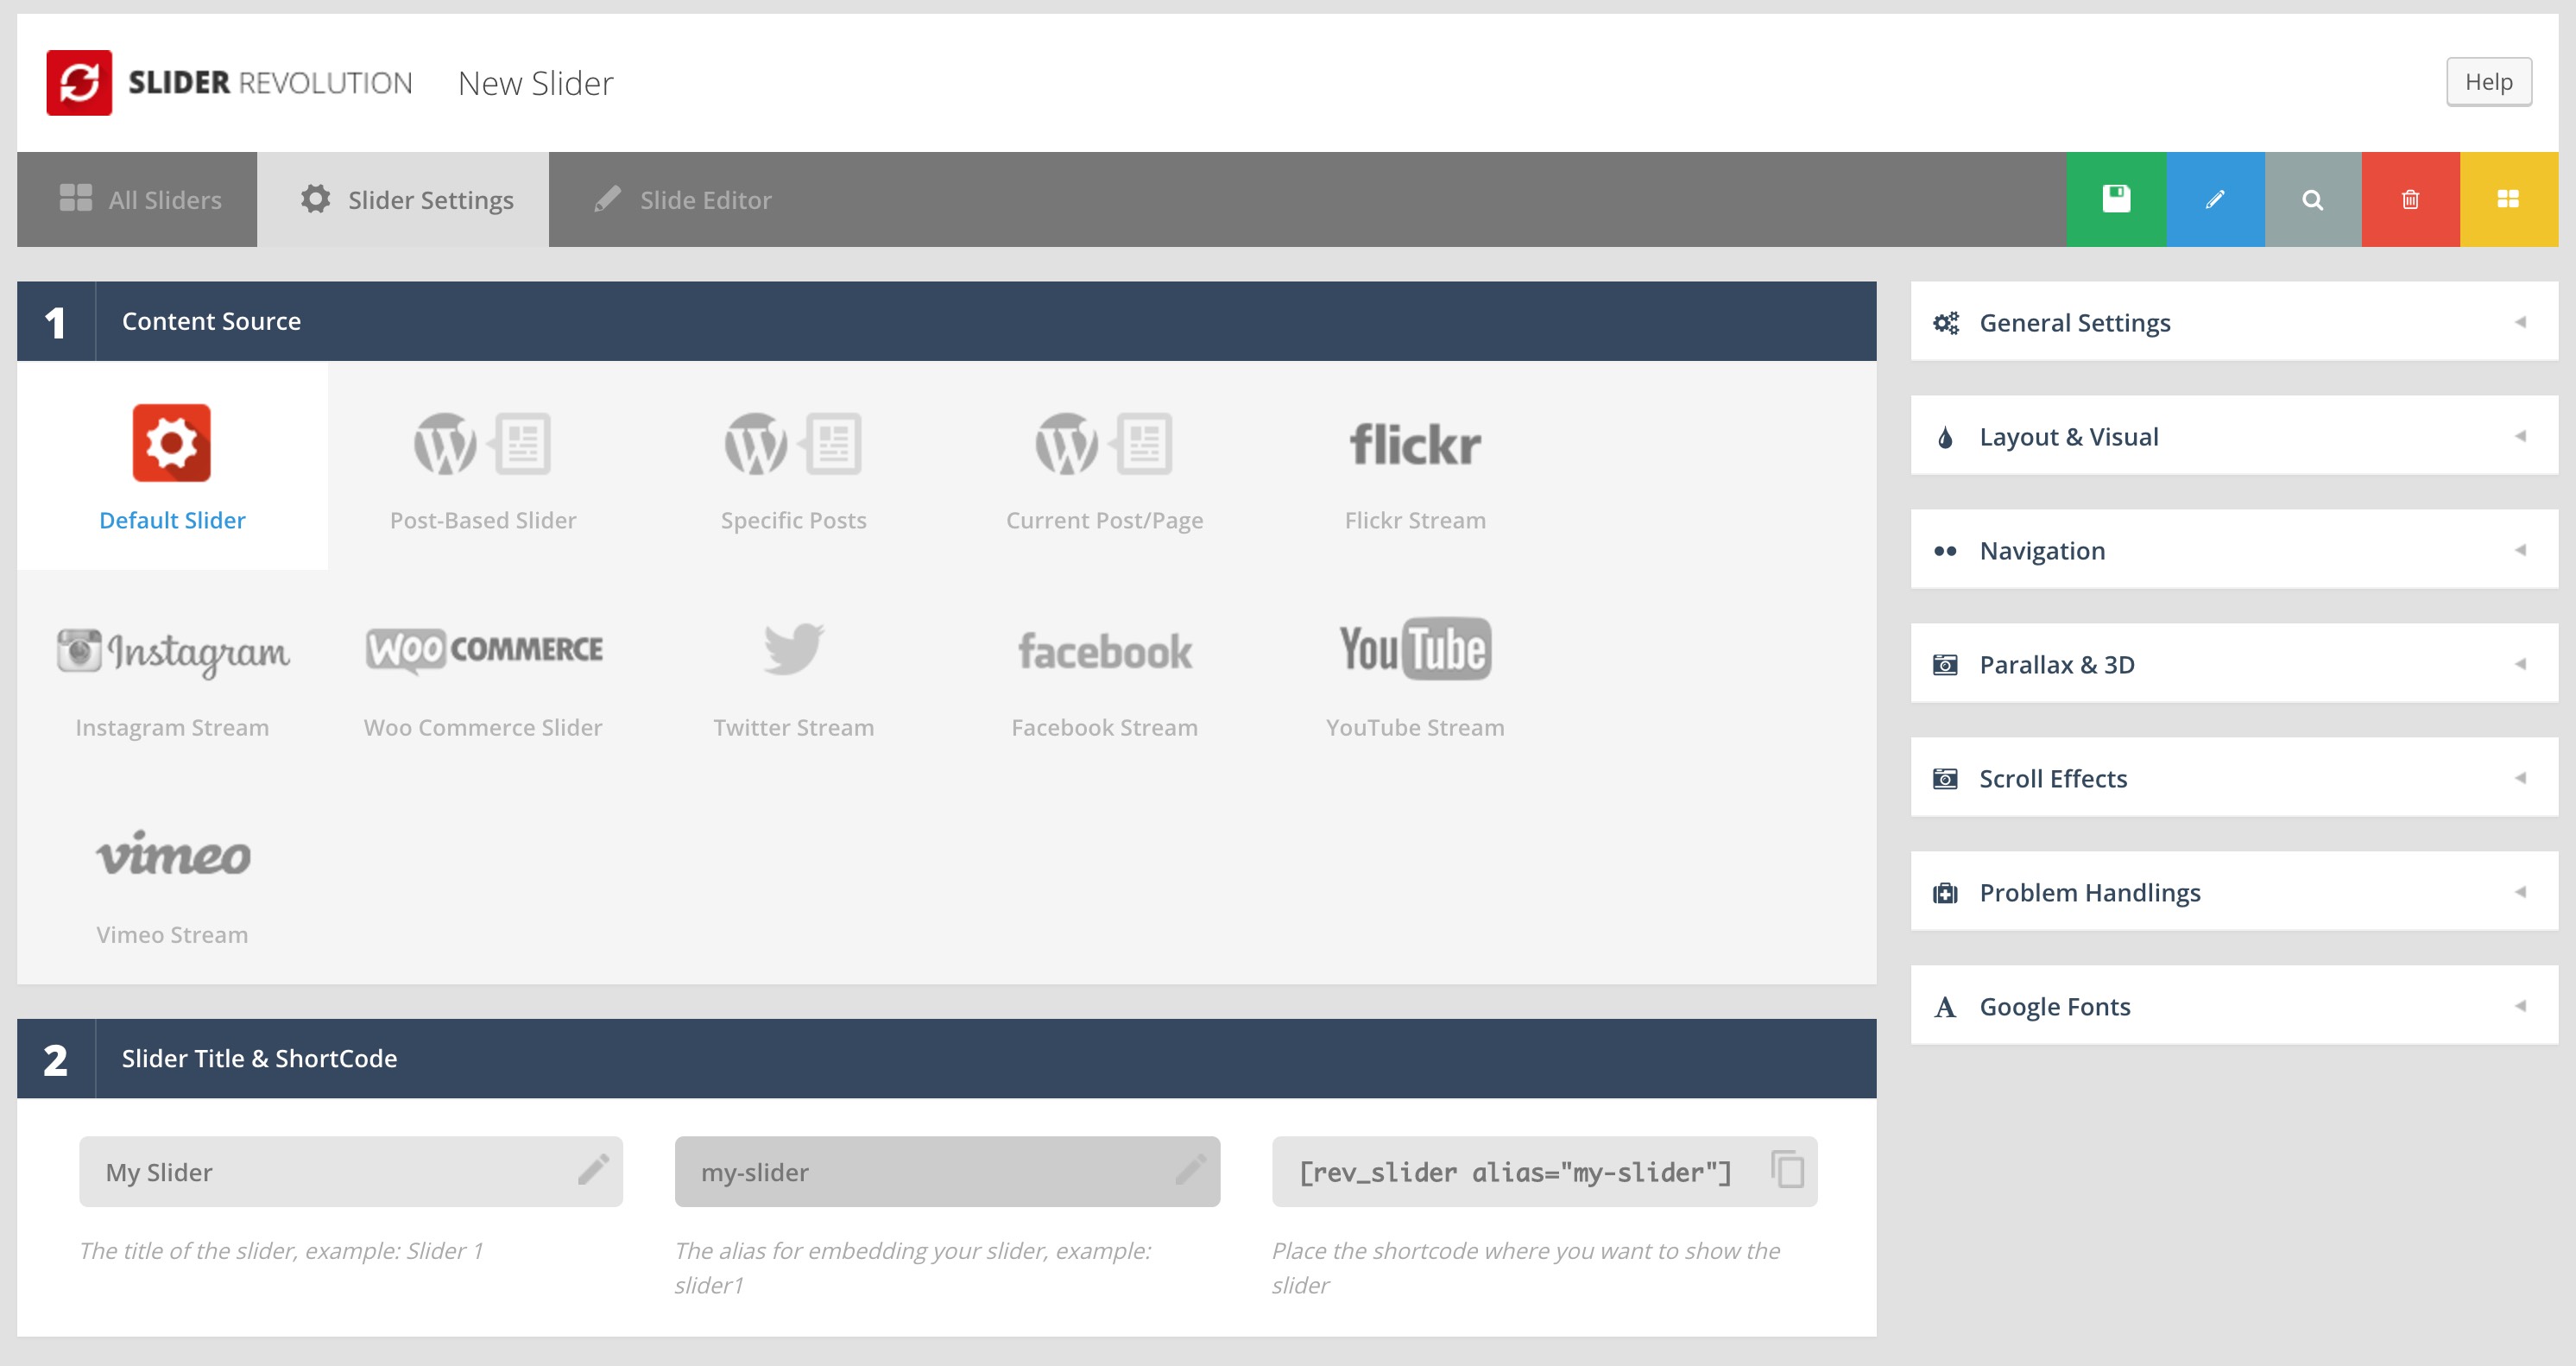
1 – Content Source
Select Default Slider for this one.
2 – Slider Title & Shortcode
Enter a Title and Alias here. Alias is required to insert this slider into any post or widget through shortcodes.
3 – Select A Slider Type
I recommend Carousel Slider yet you can choose Standard Slider as well. The main difference between these two is Carousel Slider allows to use mouse click & drag gesture on desktop devices. But it ignores the transition effects. You should select Standard Slider if transition effects is more important than mouse drag gesture for you.
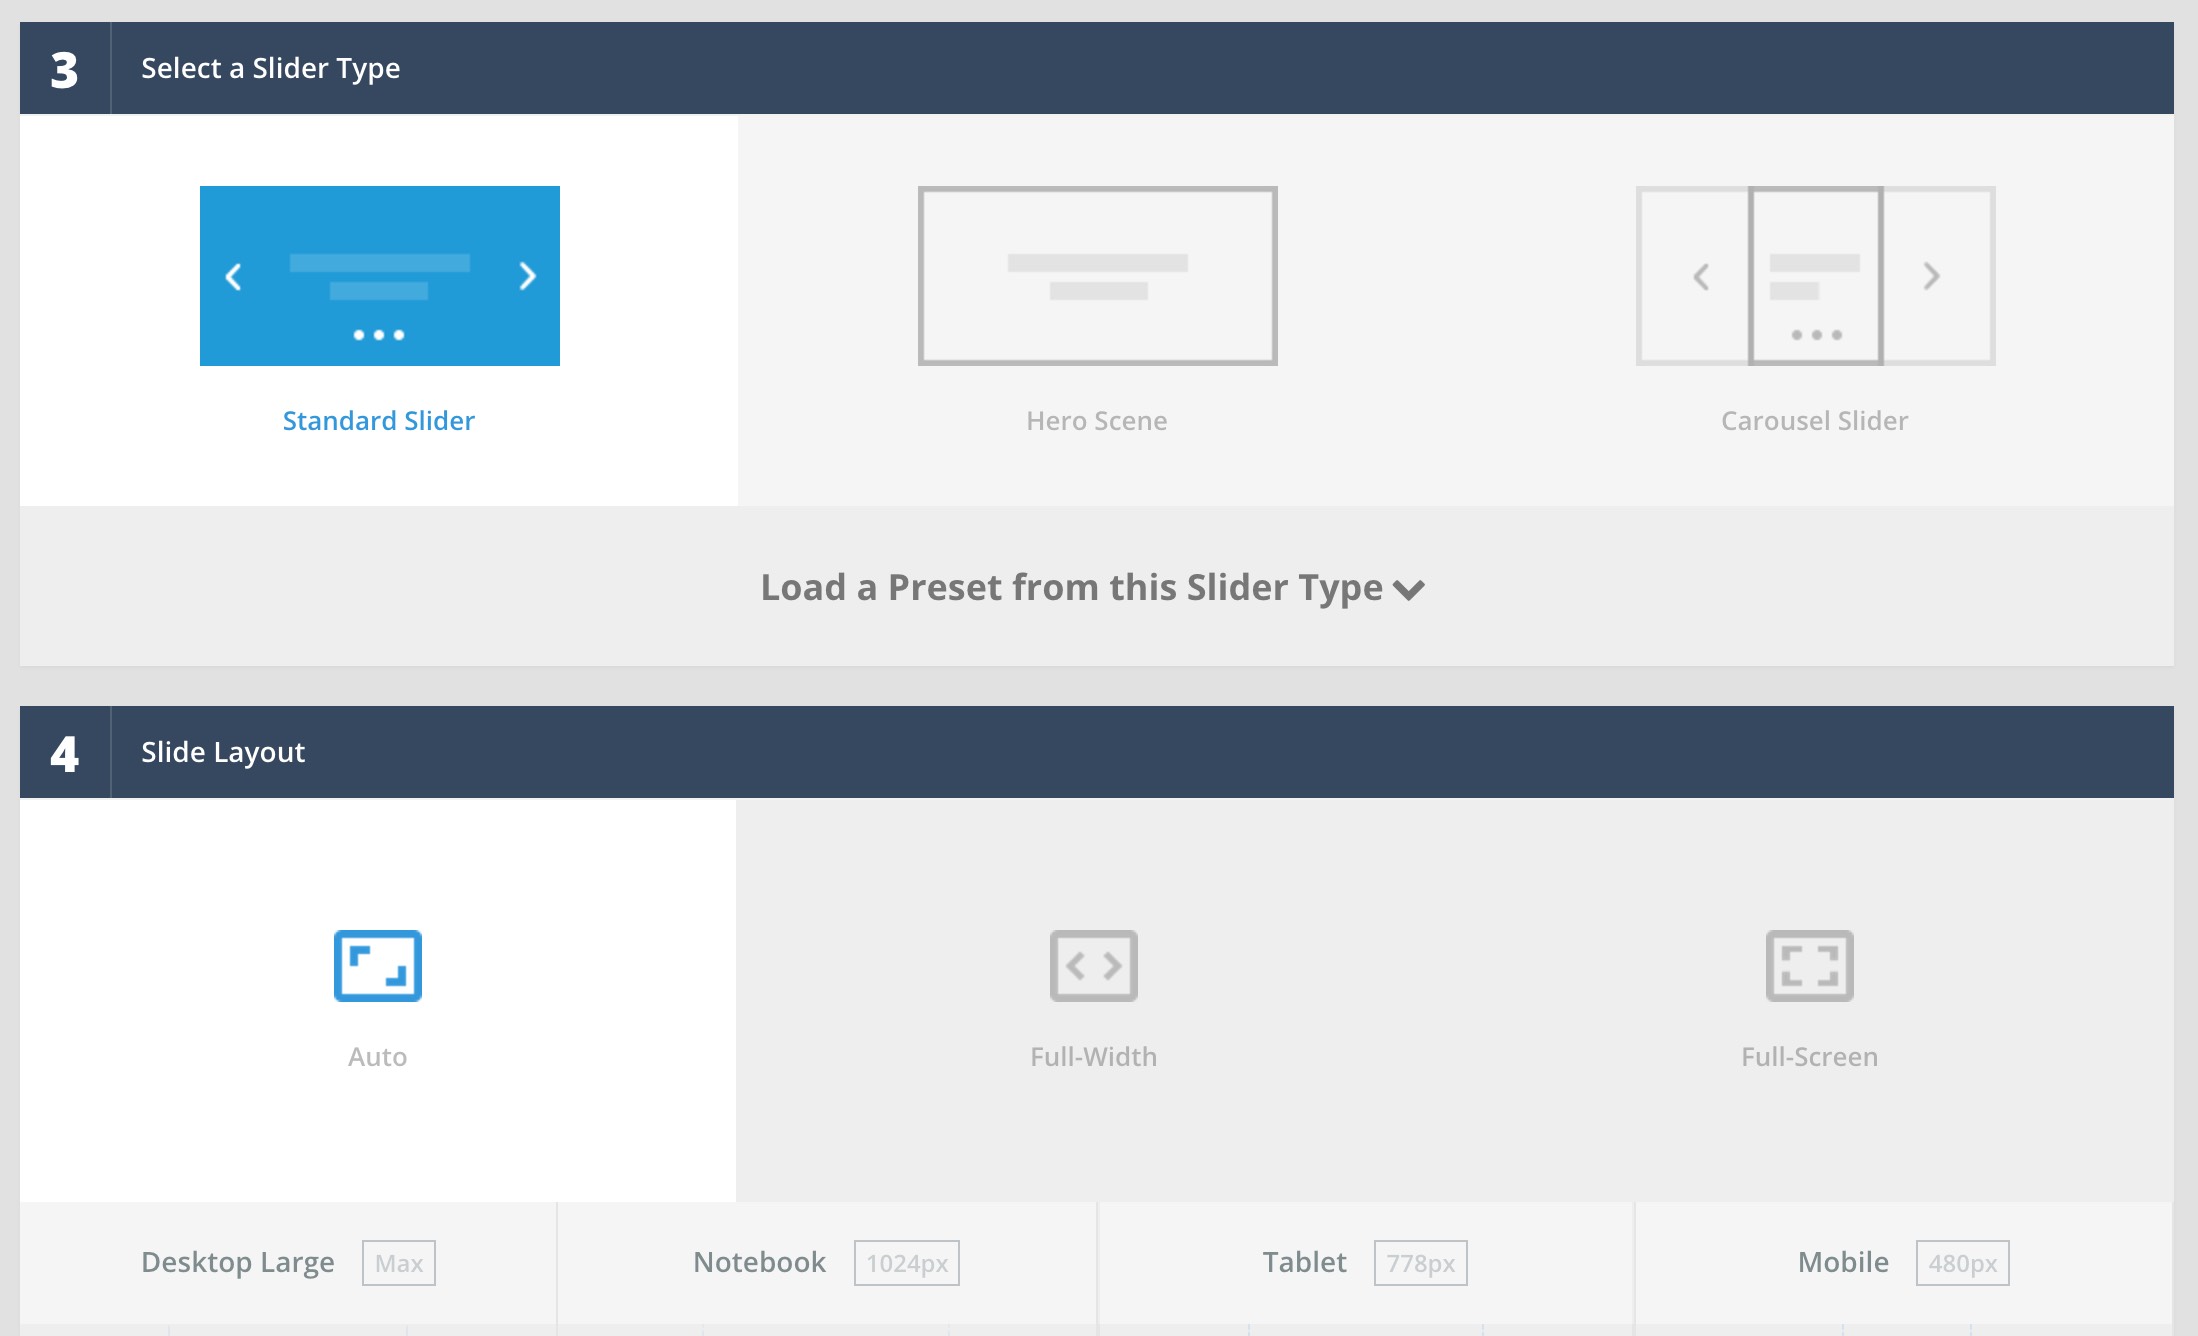
4 – Slider Layout
Select Auto as Slider Layout. Auto is just fine for a standard responsive slider fits to the container. Full Width or Full Screen options override maximum theme container size and fits it to the browser window.
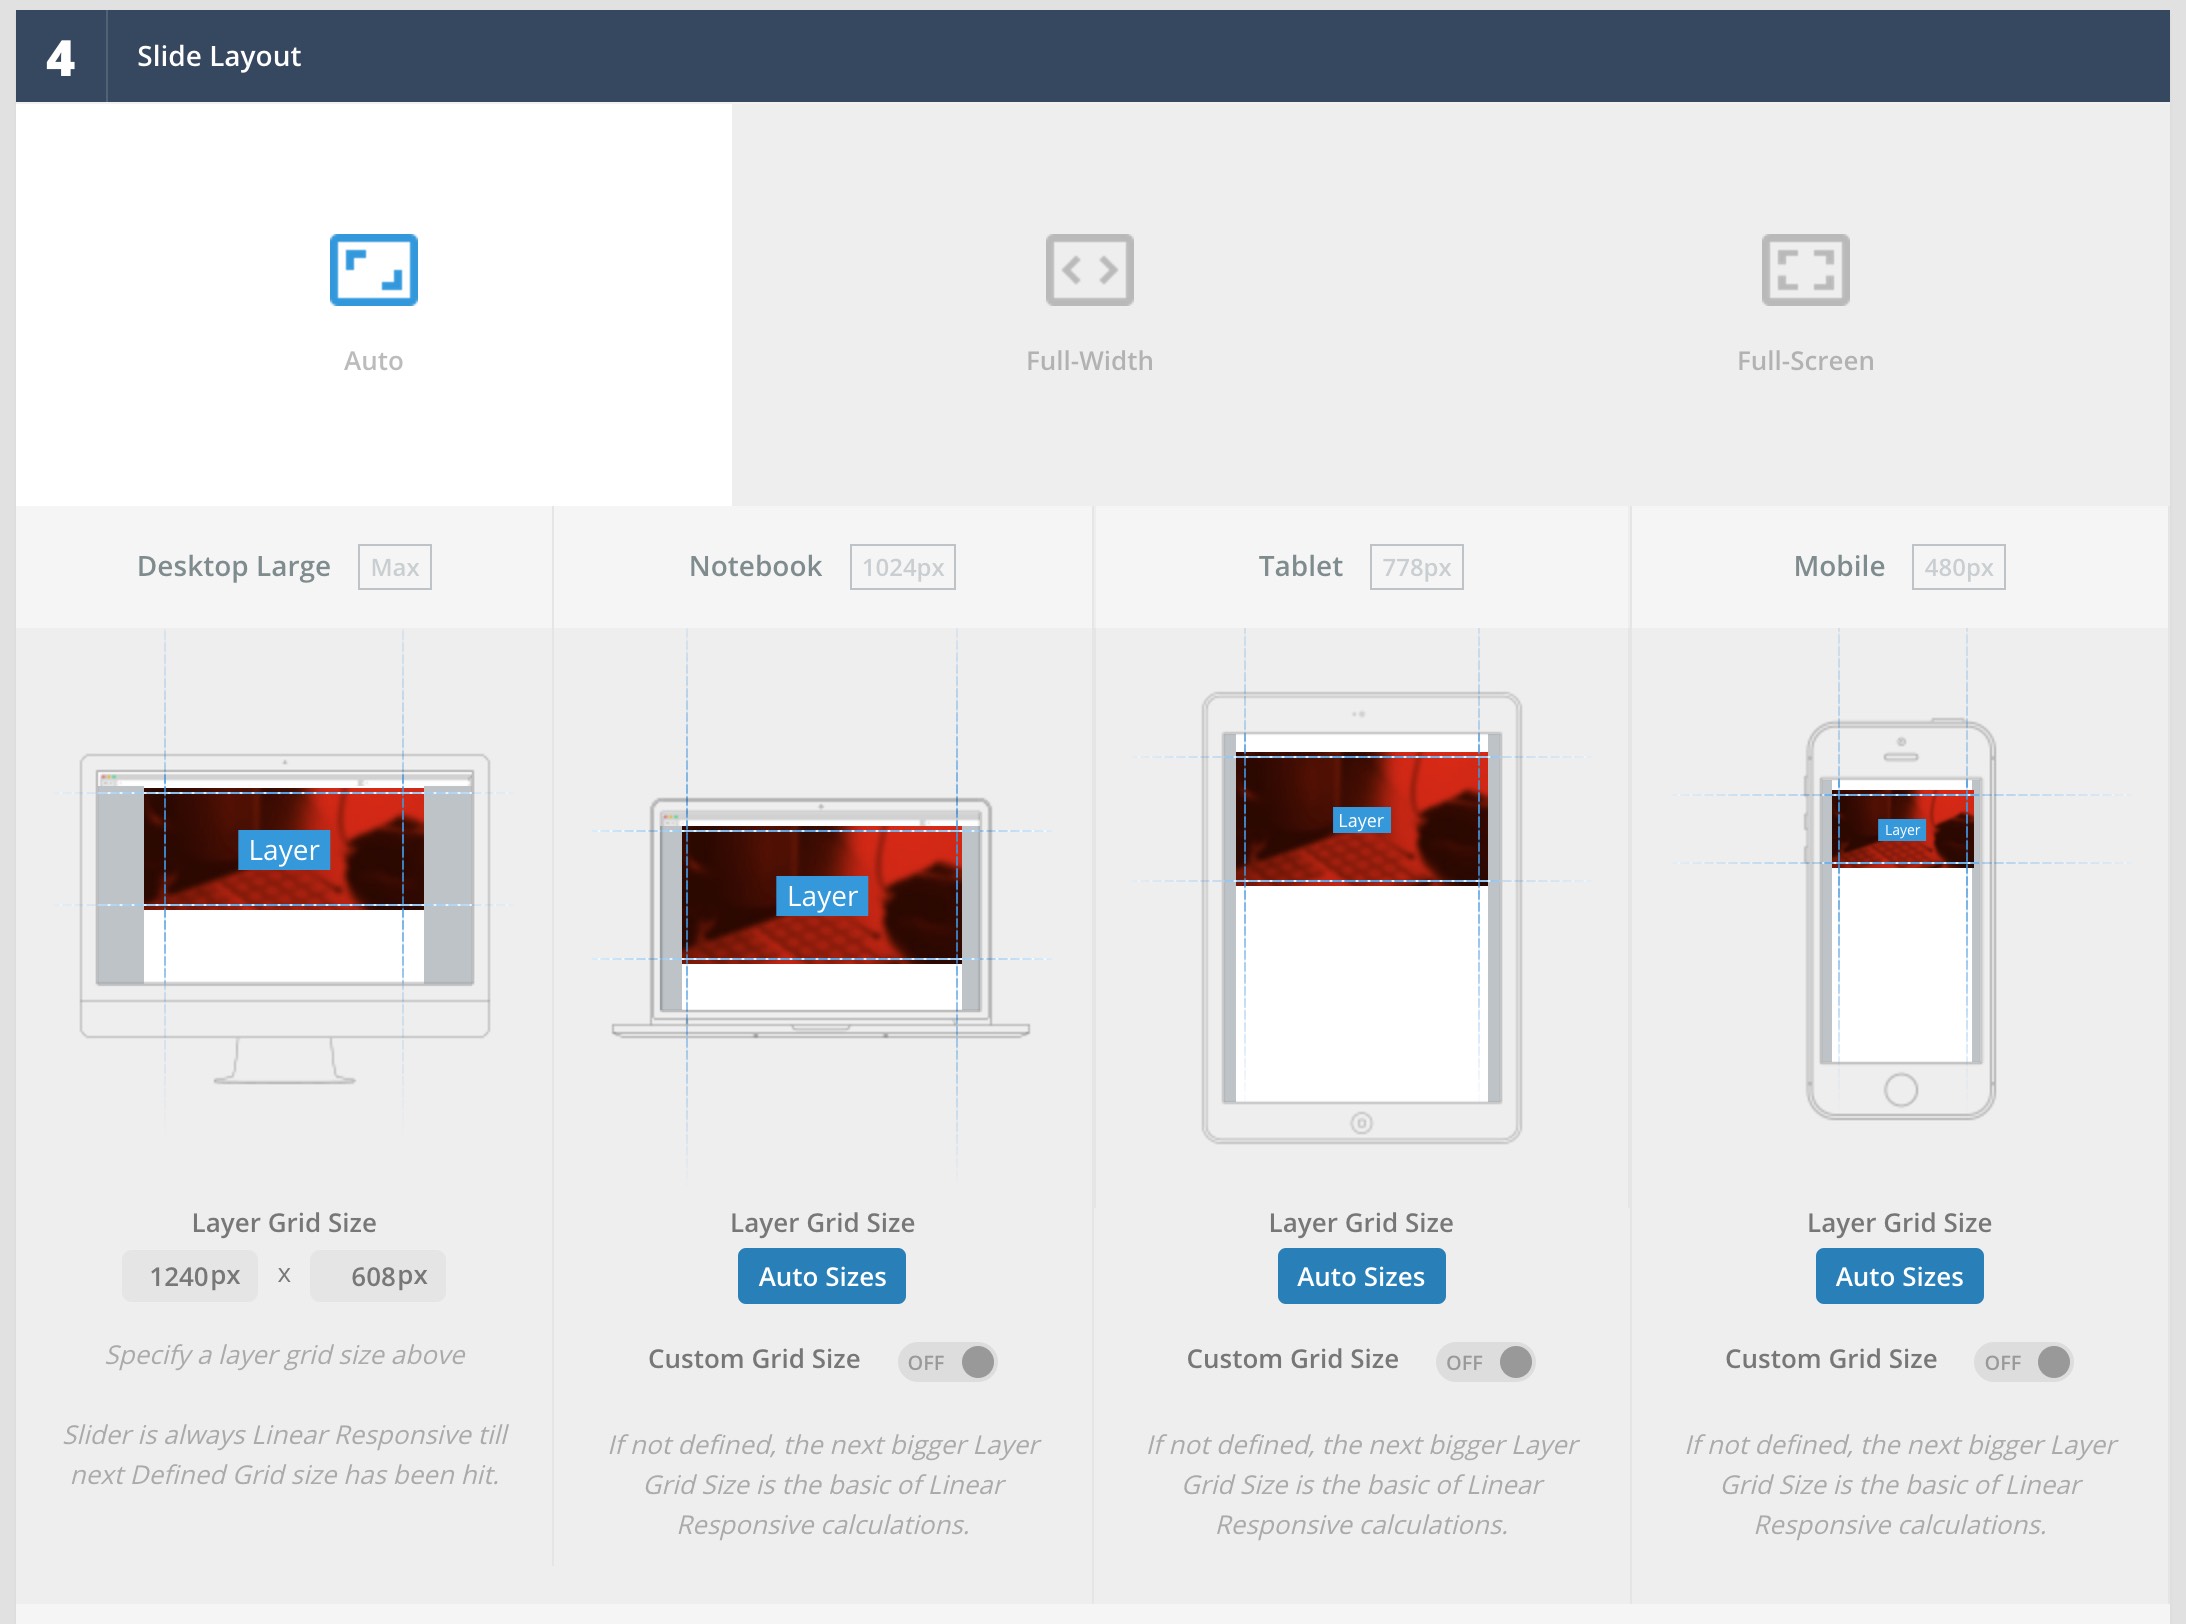
* Changing Slider Height : Screen sizes should appear right beneath Slider Layout. Although Slider Revolution calculates the slider height automatically, you may want to use a specific height. Slider height can be set from “Layer Grid Size” option. Also Custom Grid Size options provided to specify custom height values for each devices. This feature is highly useful if you specifically want to build a gallery with various image sizes.
Step B – Settings
 Slider settings located in accordion menus on sidebar. Make the following adjustments according to your needs.
General Settings
Defaults Tab :
Make general adjustments for both slider and slides. Checkboxes also provided to apply these global changes to all slides.
- Background Fit (IMPORTANT) : Cover by default. Fits image horizontally without leaving any gaps. Select Contain in order to prevent crop.
- Default Slider Duration : Set slider duration
- Animation Duration : Set transition duration
- Transition (Carousel Slider ignores) : Transition type for slides such as fade, slide etc.
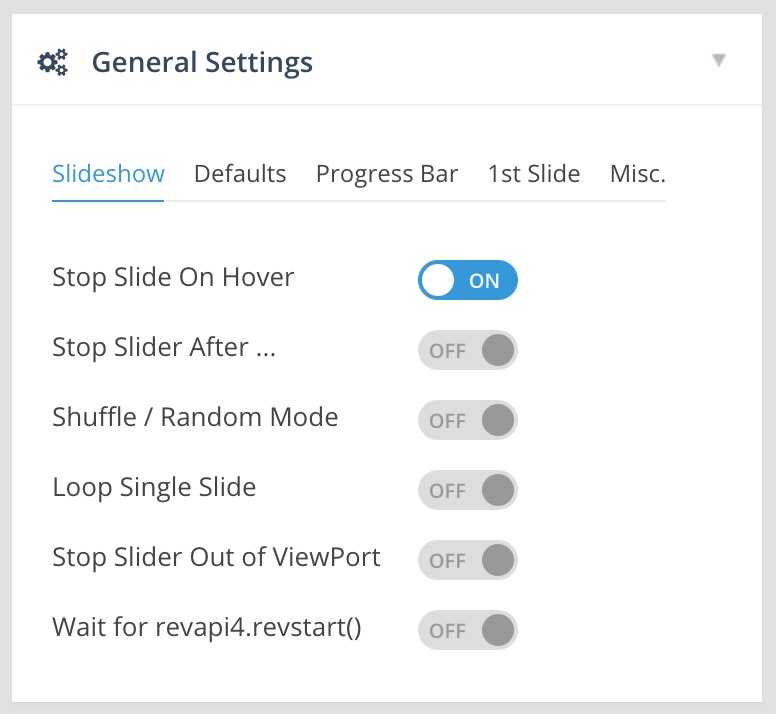
Slideshow Tab :
Activate Stop Slide On Hover option to prevent changing slide during hover action.
Layout & Visuals
Spinner Tab :
Choose Spinner type. You may like 2 or 3 as simple ones
Navigation Tab :
Allows to manage slide navigation types. Arrows and Bullets are the most popular ones. Enable one of them or both if you want to activate slide navigation. Select “No” for Visibility > Always Show option for each to activate navigation on hover. For the ones who’ll use this slider as a gallery with thumbnails, should activate it from Thumbs tab.
There are several presets for arrows and sliders. These are the neat ones are Ares, Hermes, Uranus.
Carousel Settings (Optional) :
Activate Infinite Scroll option. It creates a loop between first and last slide and allows to navigate to any side instead of going back to first slider.
Click green Save Settings (with disk icon) button to finish creating slider.
STEP C – Add Slides
Click Slide Editor (with pen icon) to create slides. Slide Editor page is consisting of three sections : Slides, Current slide settings and editor. We’ll ignore the editor features except adding a caption since this tutorial focuses on creating a basic slider.
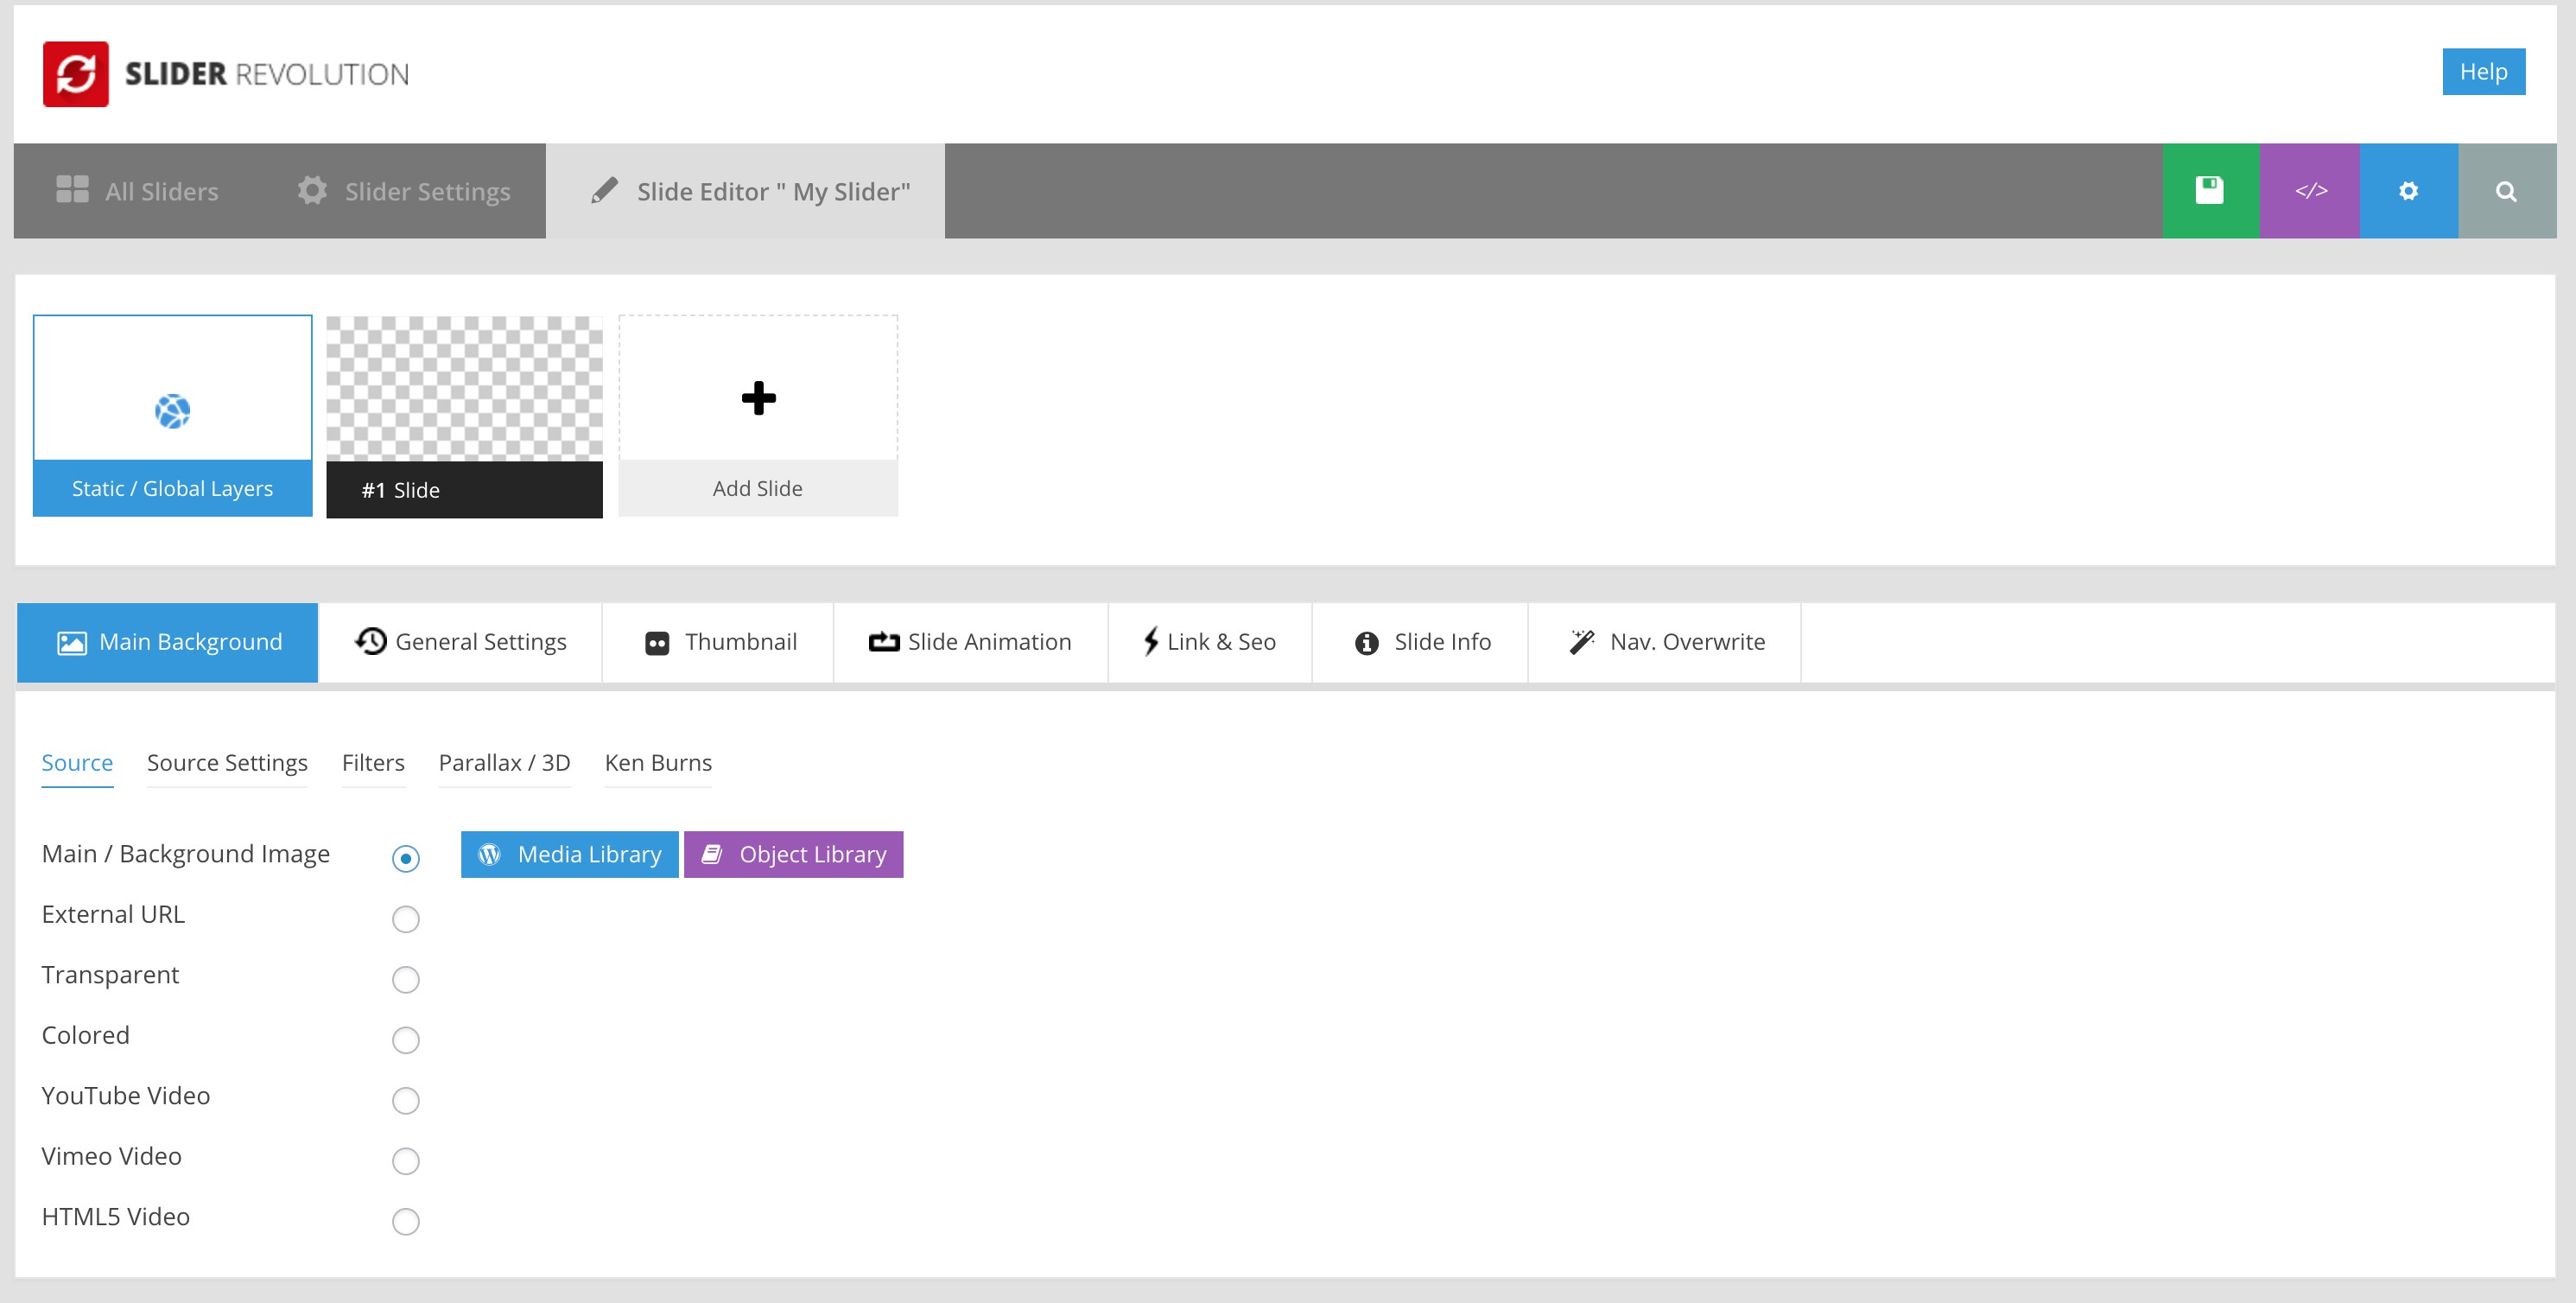
1 – Slides
This section allows to manage slides. First slide comes with Transparent setting activated.
2 – Slide Settings
This is the most important yet usually overlooked section due to editor.
Main Background section is where we build a slide’s content and allows to add a image or video easily. You might get confused by the section name, background, but actually it stands for slider’s main content.
Create Image Slider :
There are two image related options under Source tab as Main / Background Image and External URL. Main / Background Image allows to select an image your WP media library while External URL allows to use an image from external source (3rd party website etc.).
Go to Source Settings tab to change Background Fit option if it’s necessary. Select Contain option to fit image to the slider without masking.
Create Video Slider :
Select Youtube, Vimeo or HTML5 option depending on your source type. Each option provides cover image to display an image before revealing the video. This feature particularly helps to increase website performance since embedded contents make external queries.
Source Settings also provide certain options for videos such as Mute video, Rewind at slide etc.
3 – Editor
This section provides all advanced features to build a complex slider. Yet this tutorial only covers how to add an image caption.
Scroll down to editor, hover Add Layer button and select Text/HTML option. It’ll add a new layer for caption. Edit sample text as you wish.
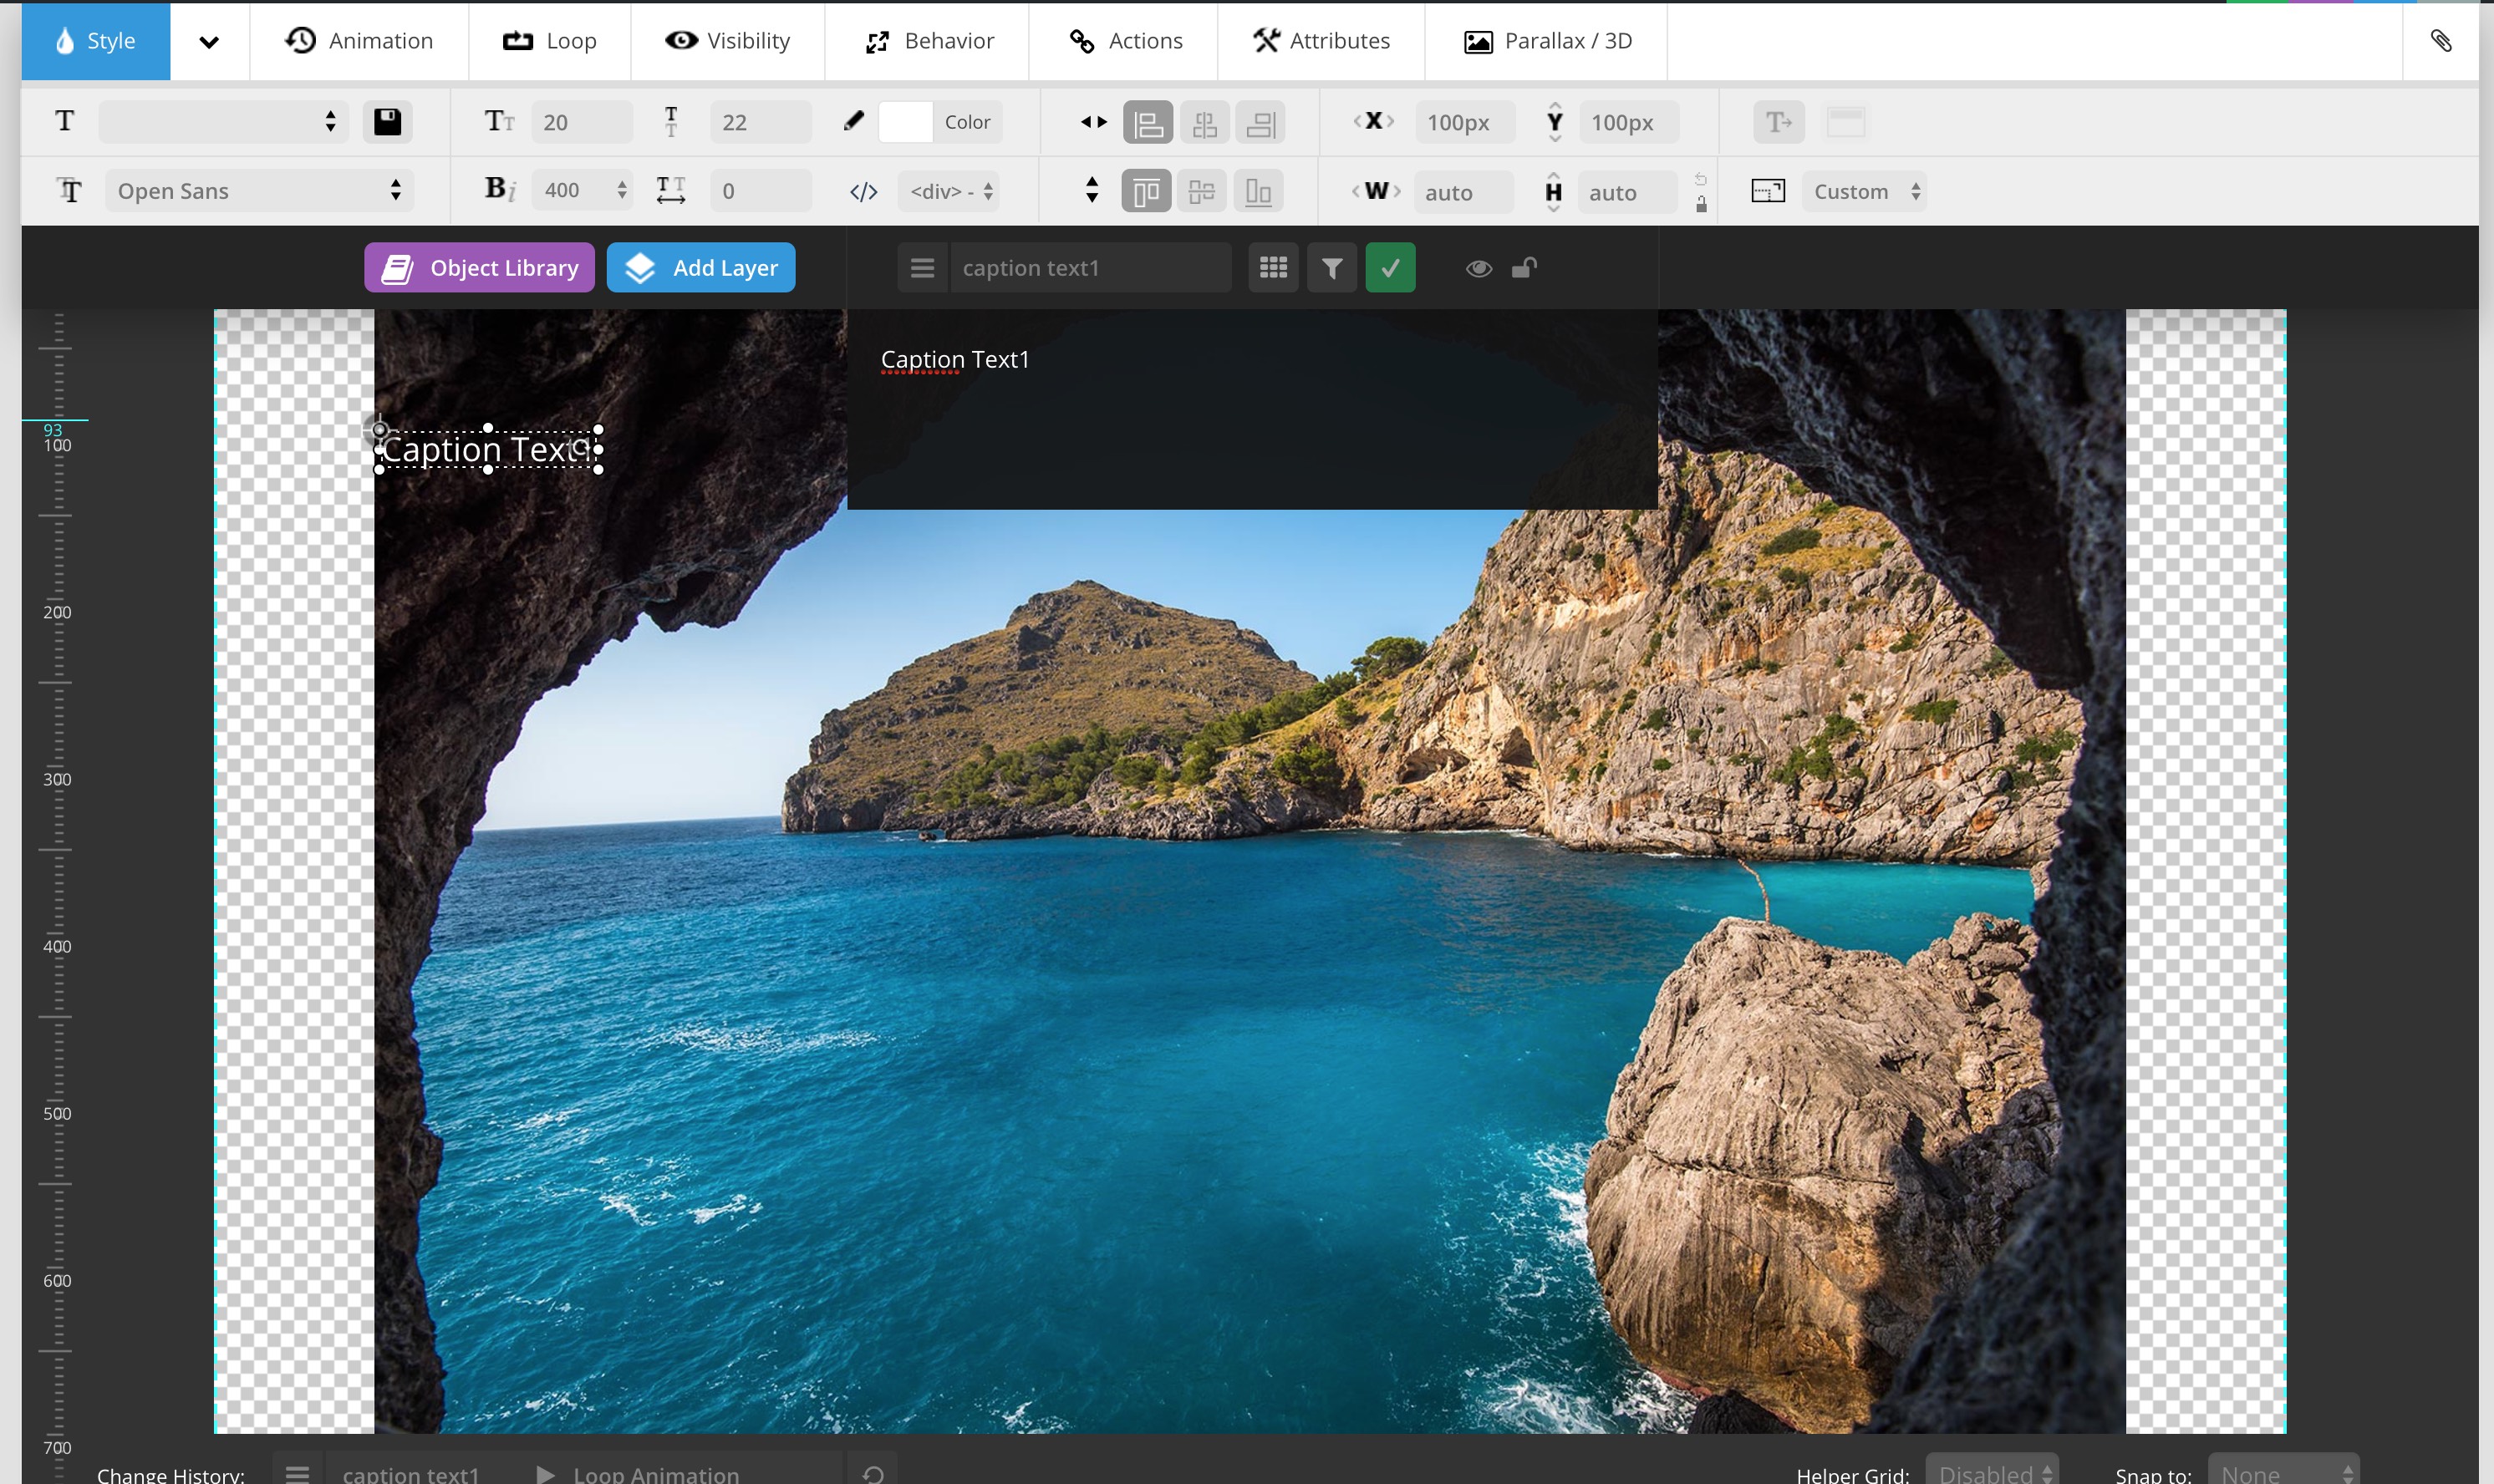
Font type and alignment options provided right below Style button. You’ll need to change alignment of the caption. Click vertical and horizontal alignment buttons according to your needs (this example is using center – bottom).

Finally you may need to add some margin to prevent overlapping issues. Margins can be added from X and Y fields. I’ll put 60px to Y field to give 60px bottom margin. If you’re using left – bottom or right – bottom, you may want to add the same value to X field form same amount of spacing.
Click green Save Slide button to save changes for this slide.
Now your slider is ready to use. You can repeat the same steps to create new slides. New slides can be either added by hover on plus (+) icon and select Blank Slide or hover on current slider and select Duplicate option.
Here is the sample file for this article :
Download Slider Sample