Theme Installation
Welcome to Northeme Theme Documentation!
This documentation covers installing and setup your theme and how to use theme features. Assuming that you already have a domain name (E.g. example.com) and web hosting service that WordPress has been installed on it.
If you’ve already installed WordPress and downloaded theme files from northeme.com, you’re ready to install the theme.
WordPress Theme Installer (Recommended)
The most convenient and easiest way to install your theme is to use WordPress Theme Installer.
Step 1: Upload Theme
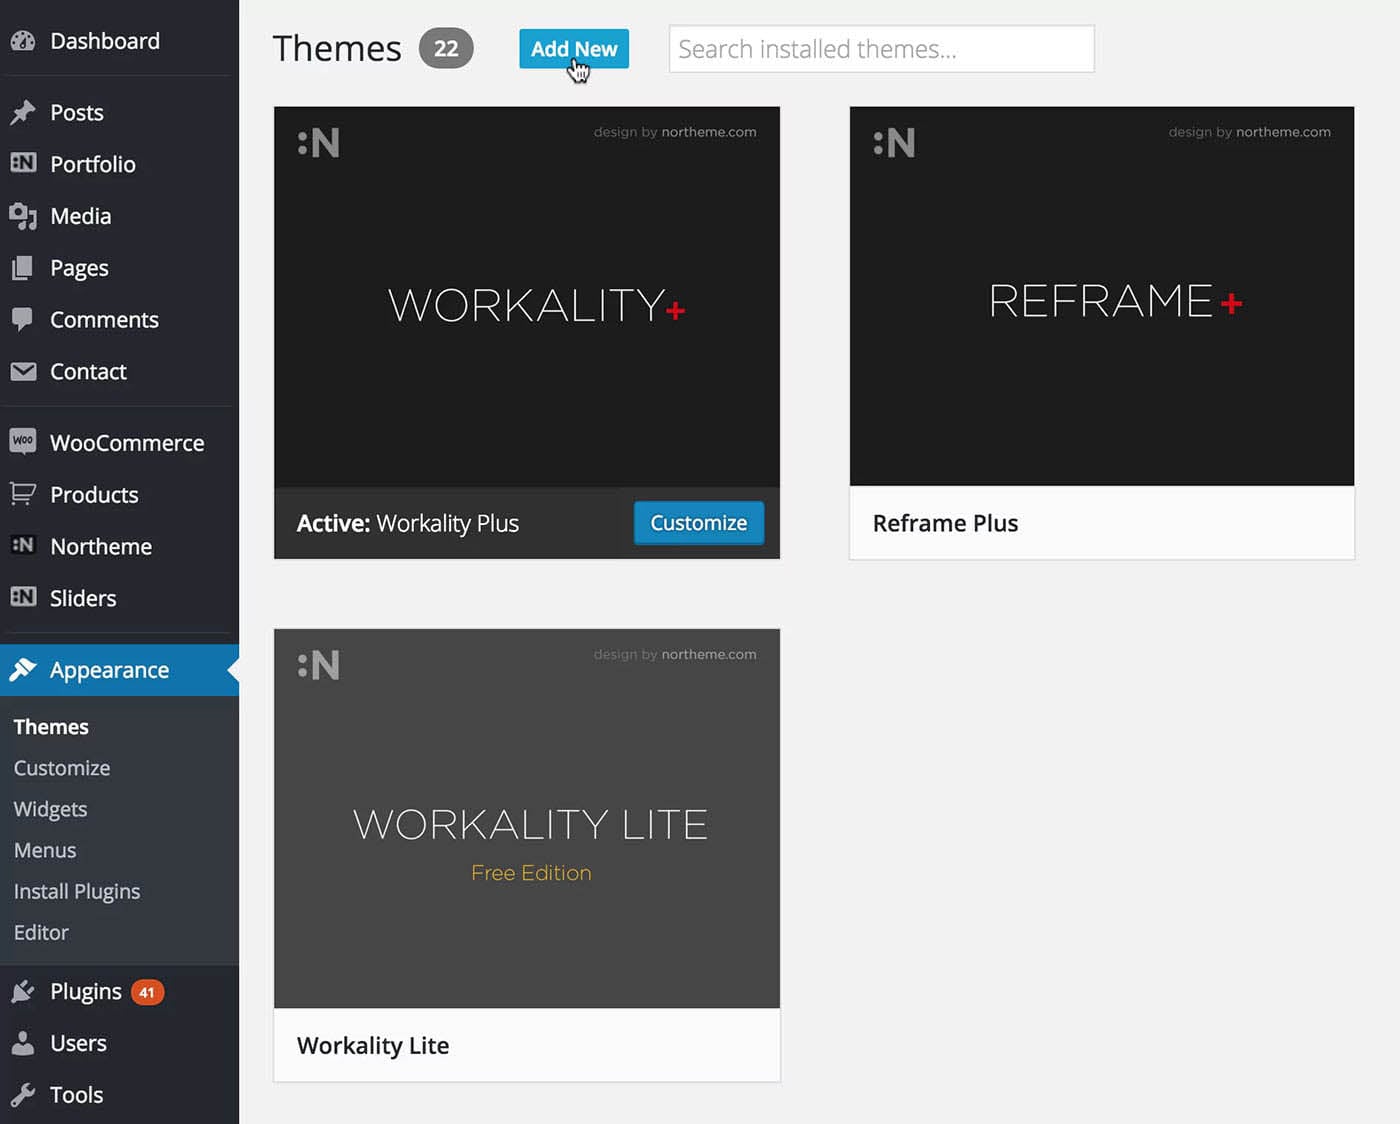
Sign in to your WordPress’ admin area and go to Appearance > Themes. You’ll find the list of themes that have already been installed to your WordPress. Click to Add New button which is located right beside the Themes title.

Step 2: Install Theme
Next page will be listing the free themes that are being provided by WordPress along with Upload button that allows to upload custom themes. Click to upload button and select the theme zip file that you’ve downloaded from My Account page.
Step 3: Activate Theme
Once the installed, you’re supposed to activate it to start using. Go back to Appearance > Themes and you should be able to see your theme in the installed themes list now. Simply click on Activate button to finalize installation.
Installing via FTP (Alternative)
This is less convenient yet another easy way to install your theme.
Some web hosting companies may keep file upload limit as low as 2MB and therefore you may not be able to install theme file via WordPress Theme Installer (You may ask your hosting provider to increase upload limit).
But there is nothing worry, you can still install the theme via FTP.
Step 1: Obtain FTP Credentials
First thing you need is your web hosting’s FTP credentials to connect FTP. You can ask this to your web hosting provider if you don’t know it yet.
Step 2: FTP Client
Afterwards, you’re supposed to use a FTP client to access and browse your website’s FTP content. We recommend to install Filezilla which is multiOS supported and free FTP client : https://filezilla-project.org/
Step 3: Connect via FTP and Upload Theme
Connect to your website’s FTP through Filezilla and go to “wp-content/themes” folder. Upload the unzipped theme folder (unzip the downloaded theme zip file) into themes folder.
Step 4: Activate Theme
Once the entire theme folder is uploaded, you’re supposed to activate it. Go back to Appearance > Themes on your WP dashboard. You should be able to see your theme in the installed themes list now. Simply click on Activate button to finalize installation.
Important: Installation via FTP may require to set file permissions to 755 (read / write). Check WordPress Help for more information.
Updating Your Theme
It’s almost same process with installation. If you’re going to do it from Appearance > Themes, you’re supposed to delete the current theme first then re-upload theme zip file.
As for FTP, you can delete or rename the theme folder from wp-content/themes and upload zip file content.
Note that deleting theme folder will NOT cause any data loss.
If you need any further information about installing themes please see the following article : https://codex.wordpress.org/Installing_WordPress