One Page Theme
Madrigal offers a one-page template, enabling you to build a seamless single-page website.
To create a one-page website, navigate to Pages in your WordPress dashboard and click Add New Page.
Build a One-Page Website
Page Title
Set a title for your page.
Single Page Activation
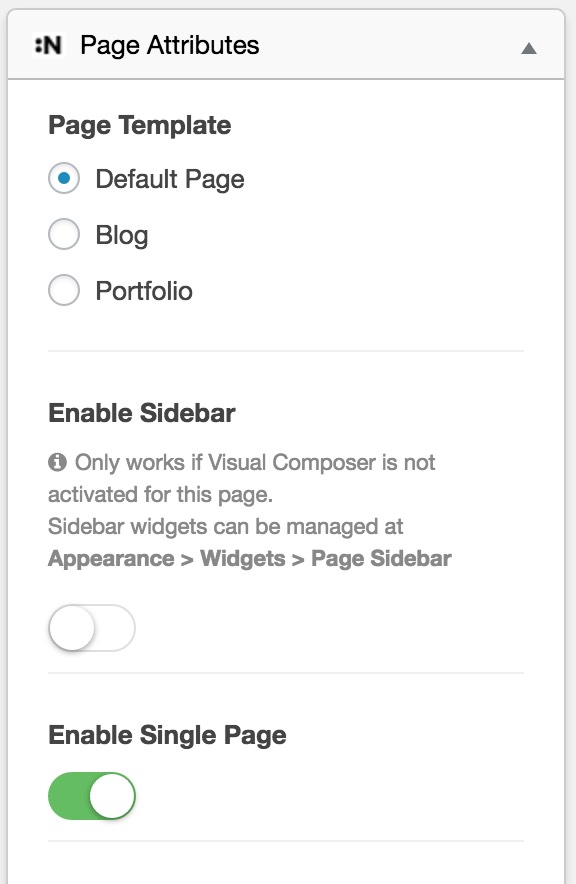
Activate the Enable Single Page option under Page Attributes and ensure the Default Page template is selected.
One Page Settings
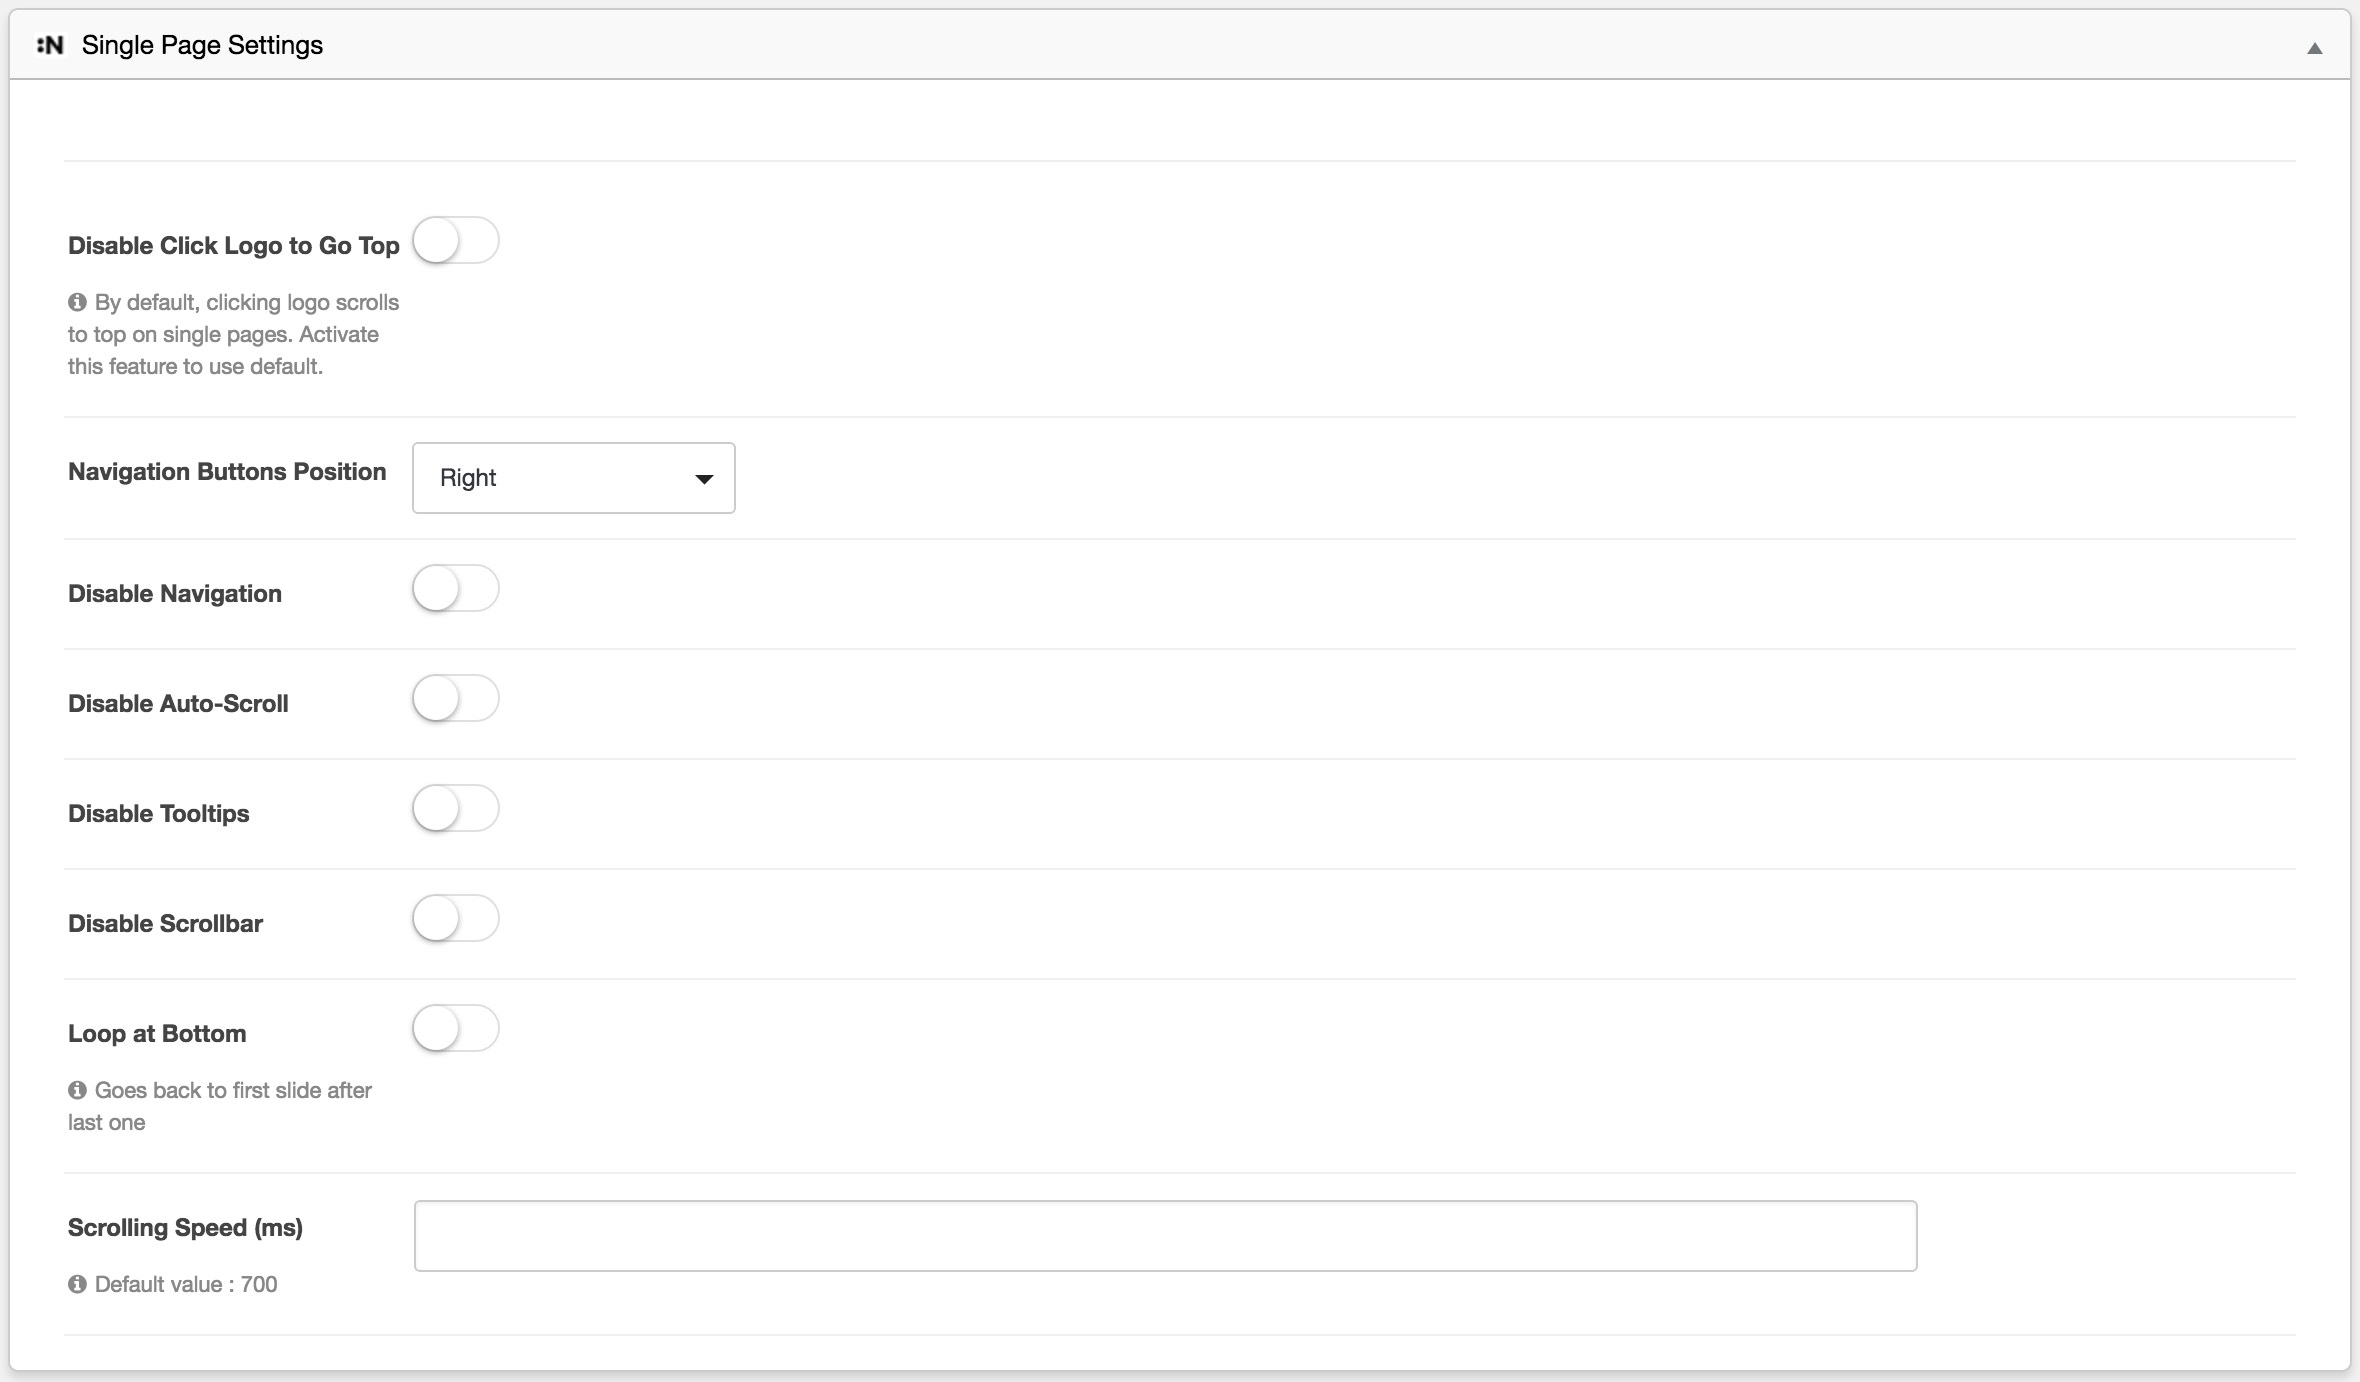
After enabling the single-page option, the Single Page Settings panel will appear. Use this panel to adjust one-page settings such as scrolling type, navigation side, and more.
Activate WPBakery
Create your page content using WPBakery. Click the Backend Mode button below the page title to activate WPBakery.
You can use a pre-built WPBakery Template by clicking the Add Template button and selecting Northeme – Single Page Template.
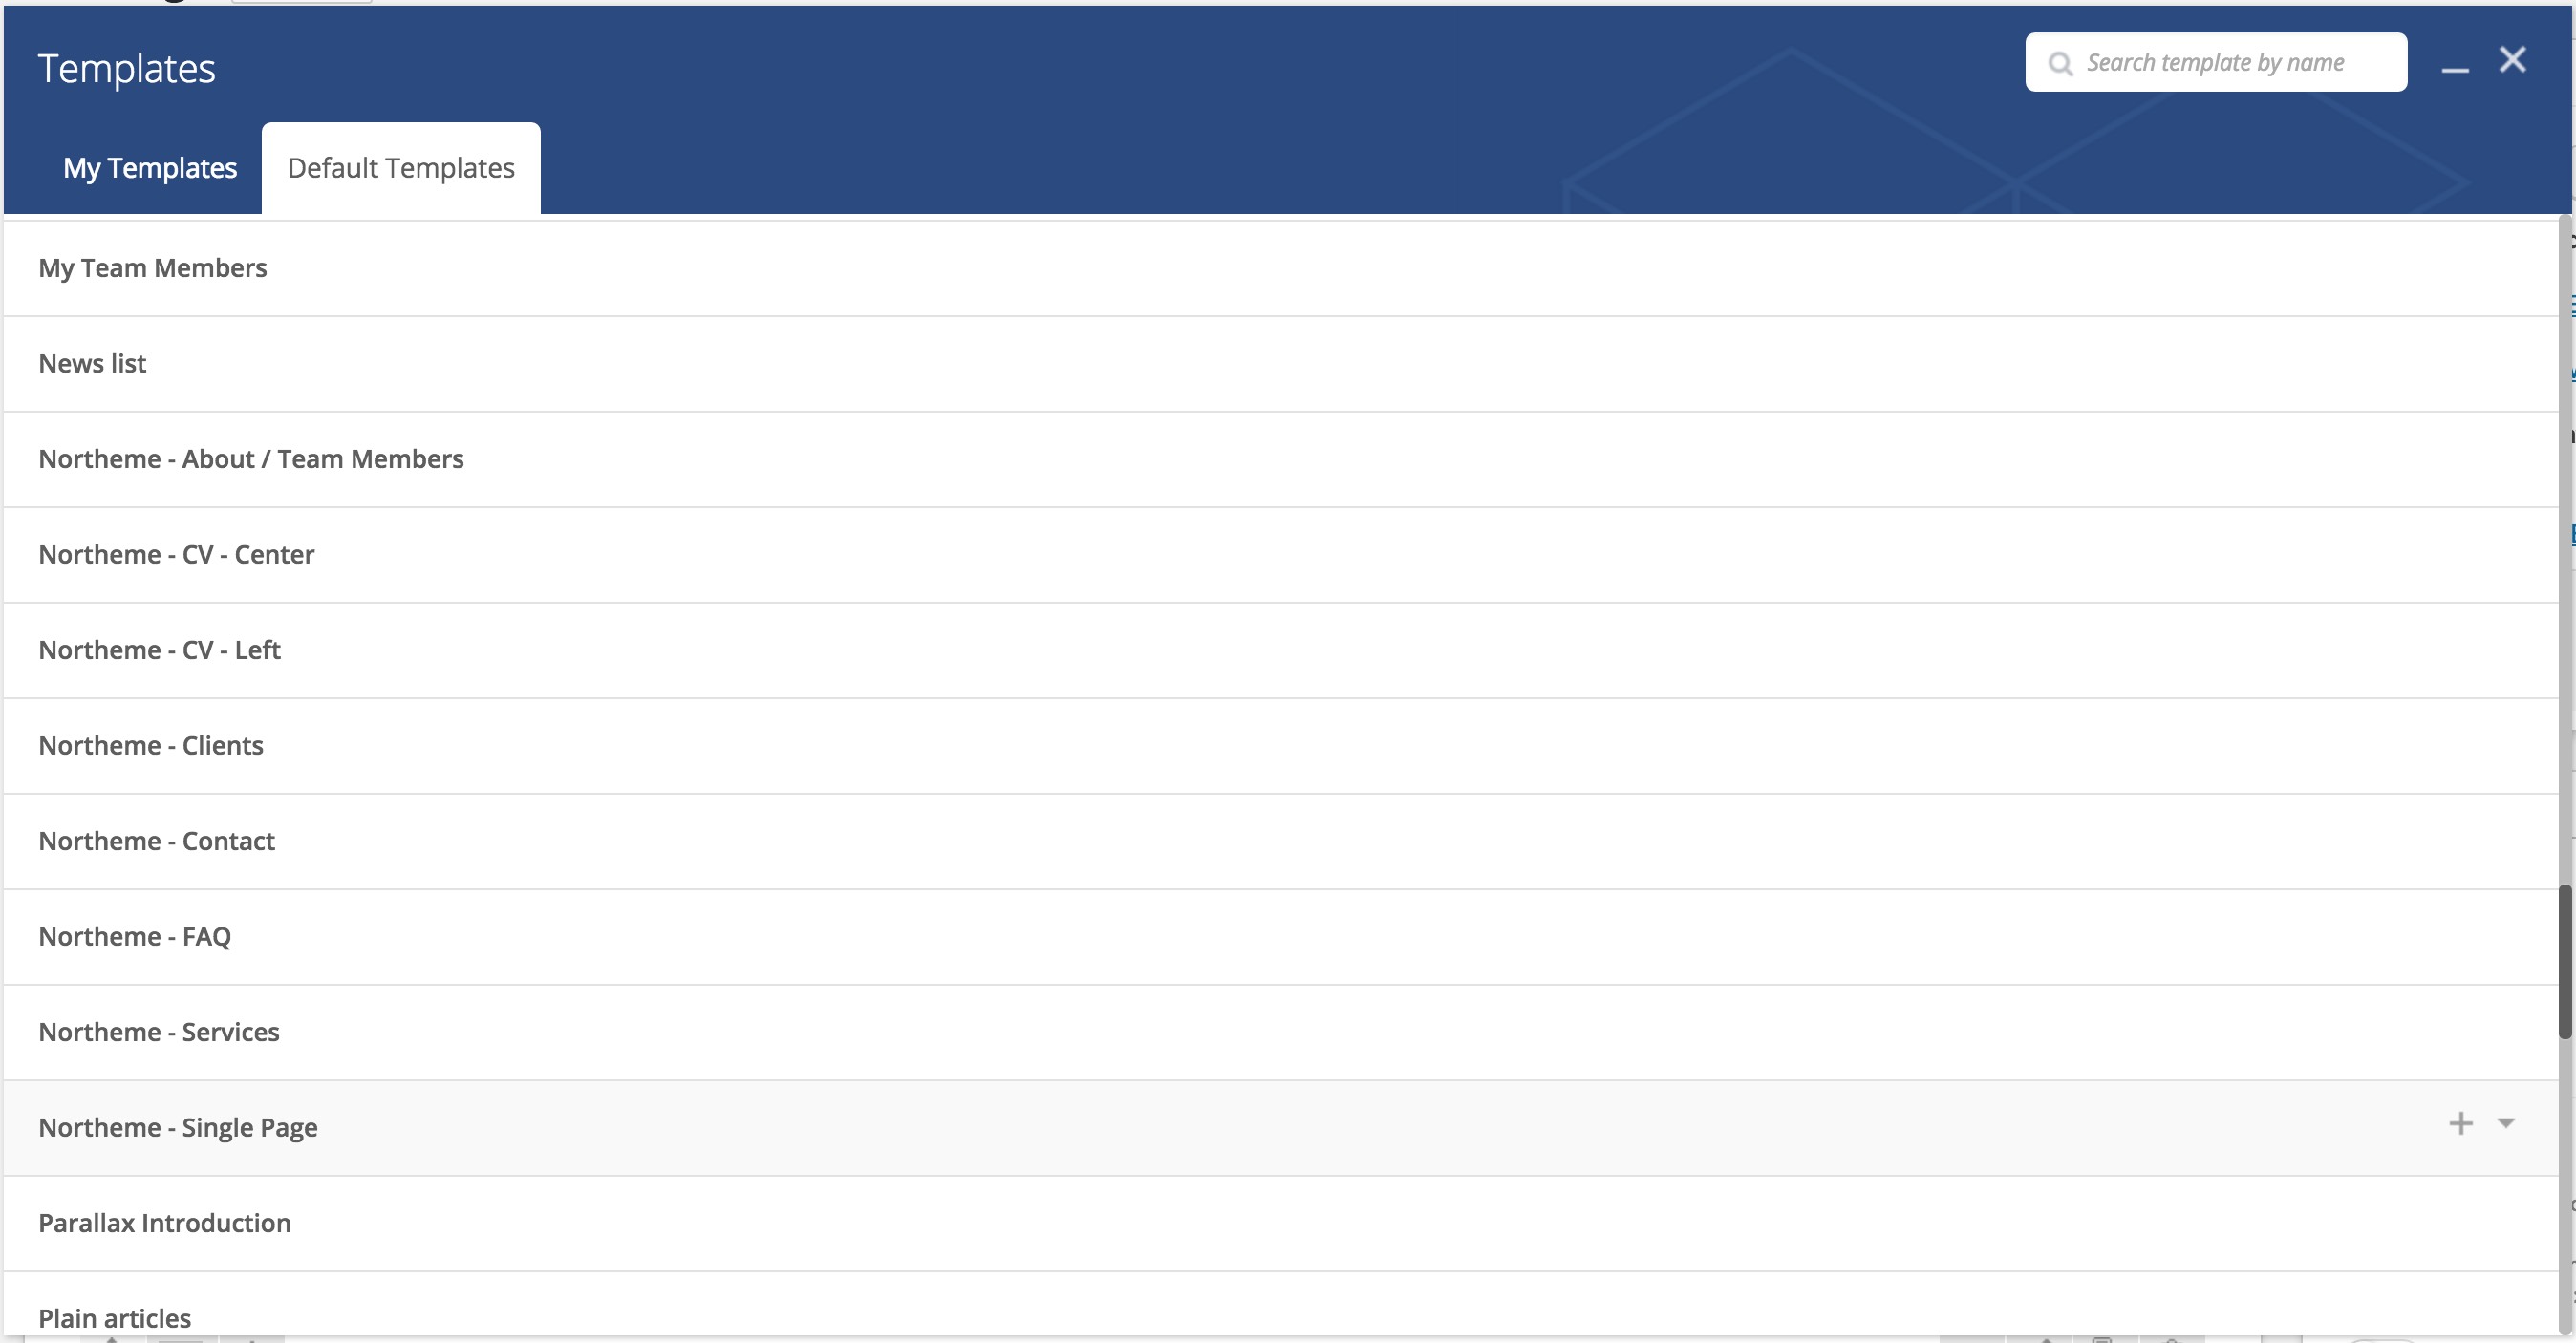
Page Content
The one-page template includes an auto-scroll feature, allowing navigation between sections by scrolling up or down.
Each Row element in WPBakery will represent a full-height section on your website.
An example layout:
- Heading for a category (with a background image).
- Single Page Posts element displaying posts from a specific category.
- Heading for another category (with a background image).
- Single Page Posts element displaying another category.
- A section for contact information.
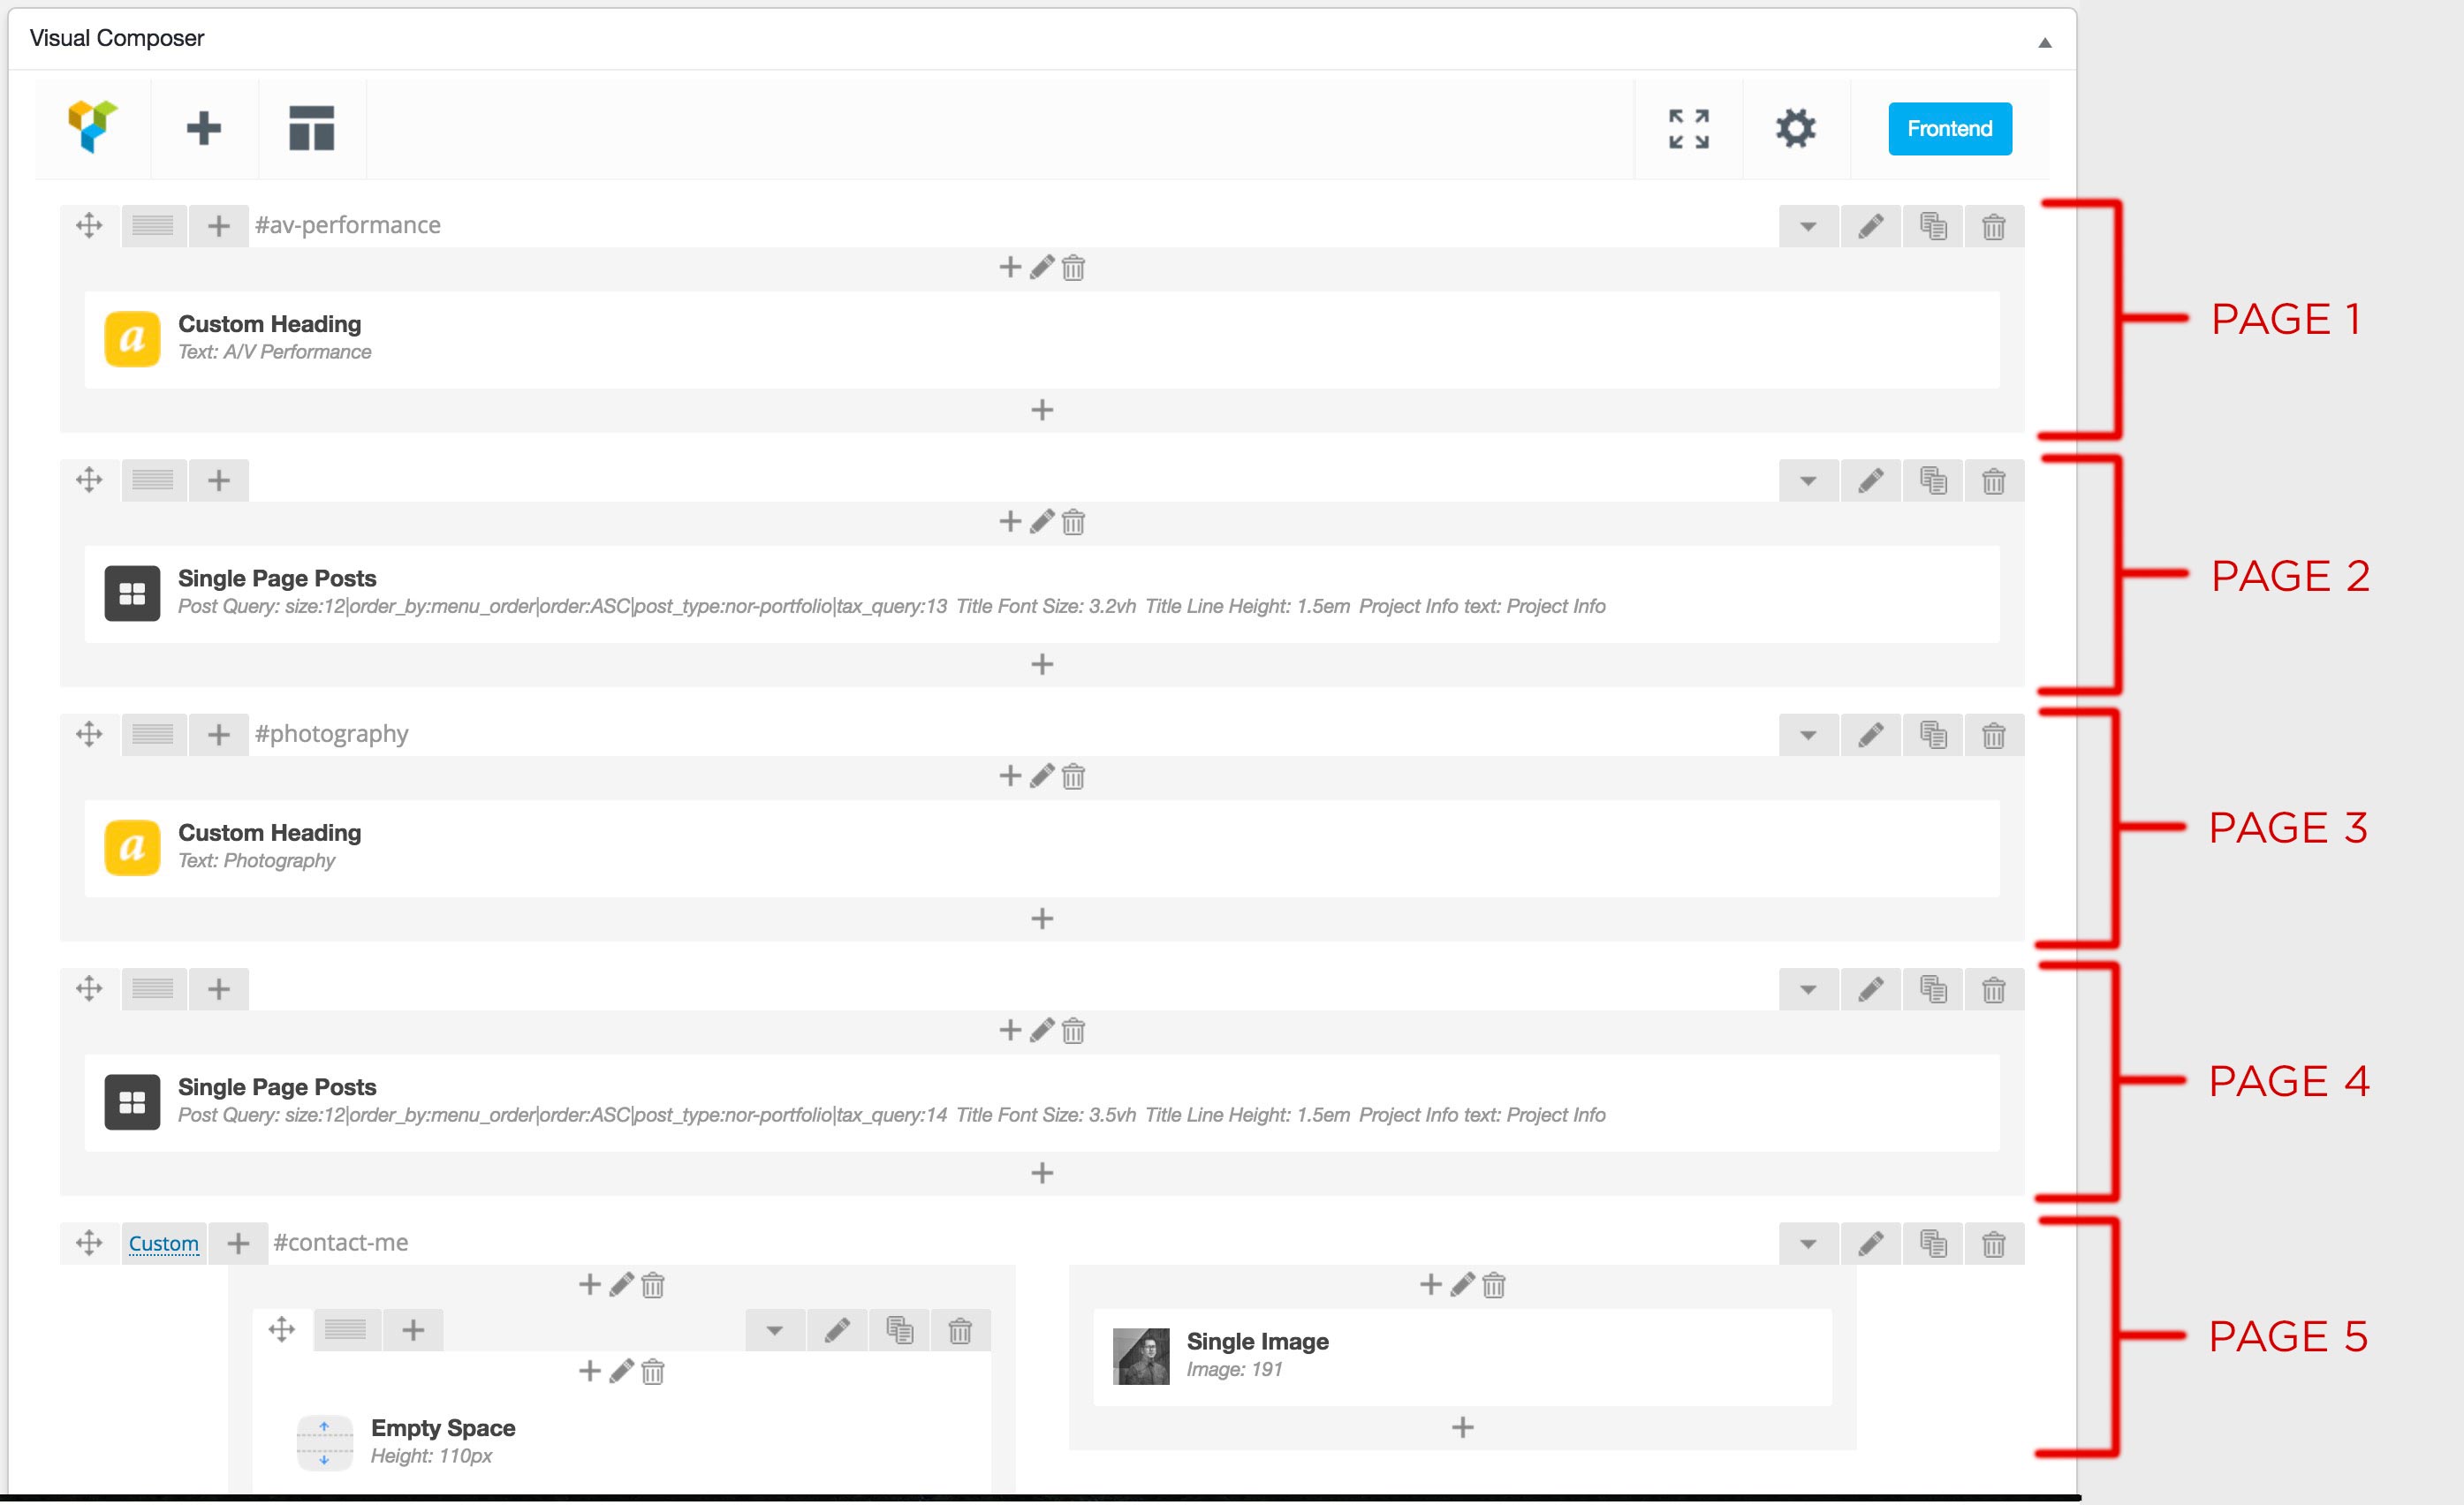
Elements
Since each row acts as a page in the one-page template, you can customize rows with any content.
For headings, the Custom Header element is used. Parallax scrolling and background images can be enabled via the row settings (pen icon in the top-right corner).
Single Page Posts (Element)
The Single Page Posts element, exclusive to Northeme, displays posts from a post type such as Portfolio, Blog, or WooCommerce Products.
Each post behaves as a section within the one-page template. To keep it concise, use shorter post content or the “Insert More Tag” to limit the text.
To add a Single Page Posts element:
- Click the Plus (+) button in WPBakery.
- Select Single Page Posts from the menu.
When adding the element, a settings window will appear with customization options such as:
- Layout (one or two columns).
- Display options for title, category, or date.
- Linking posts to their single-post pages.
Build Query
Use the Build Query button to configure the posts displayed:
- Select a post type:
- post = Blog
- nor-portfolio = Portfolio
- product = WooCommerce Products
- Adjust post limits, categories, or taxonomies to display specific posts.
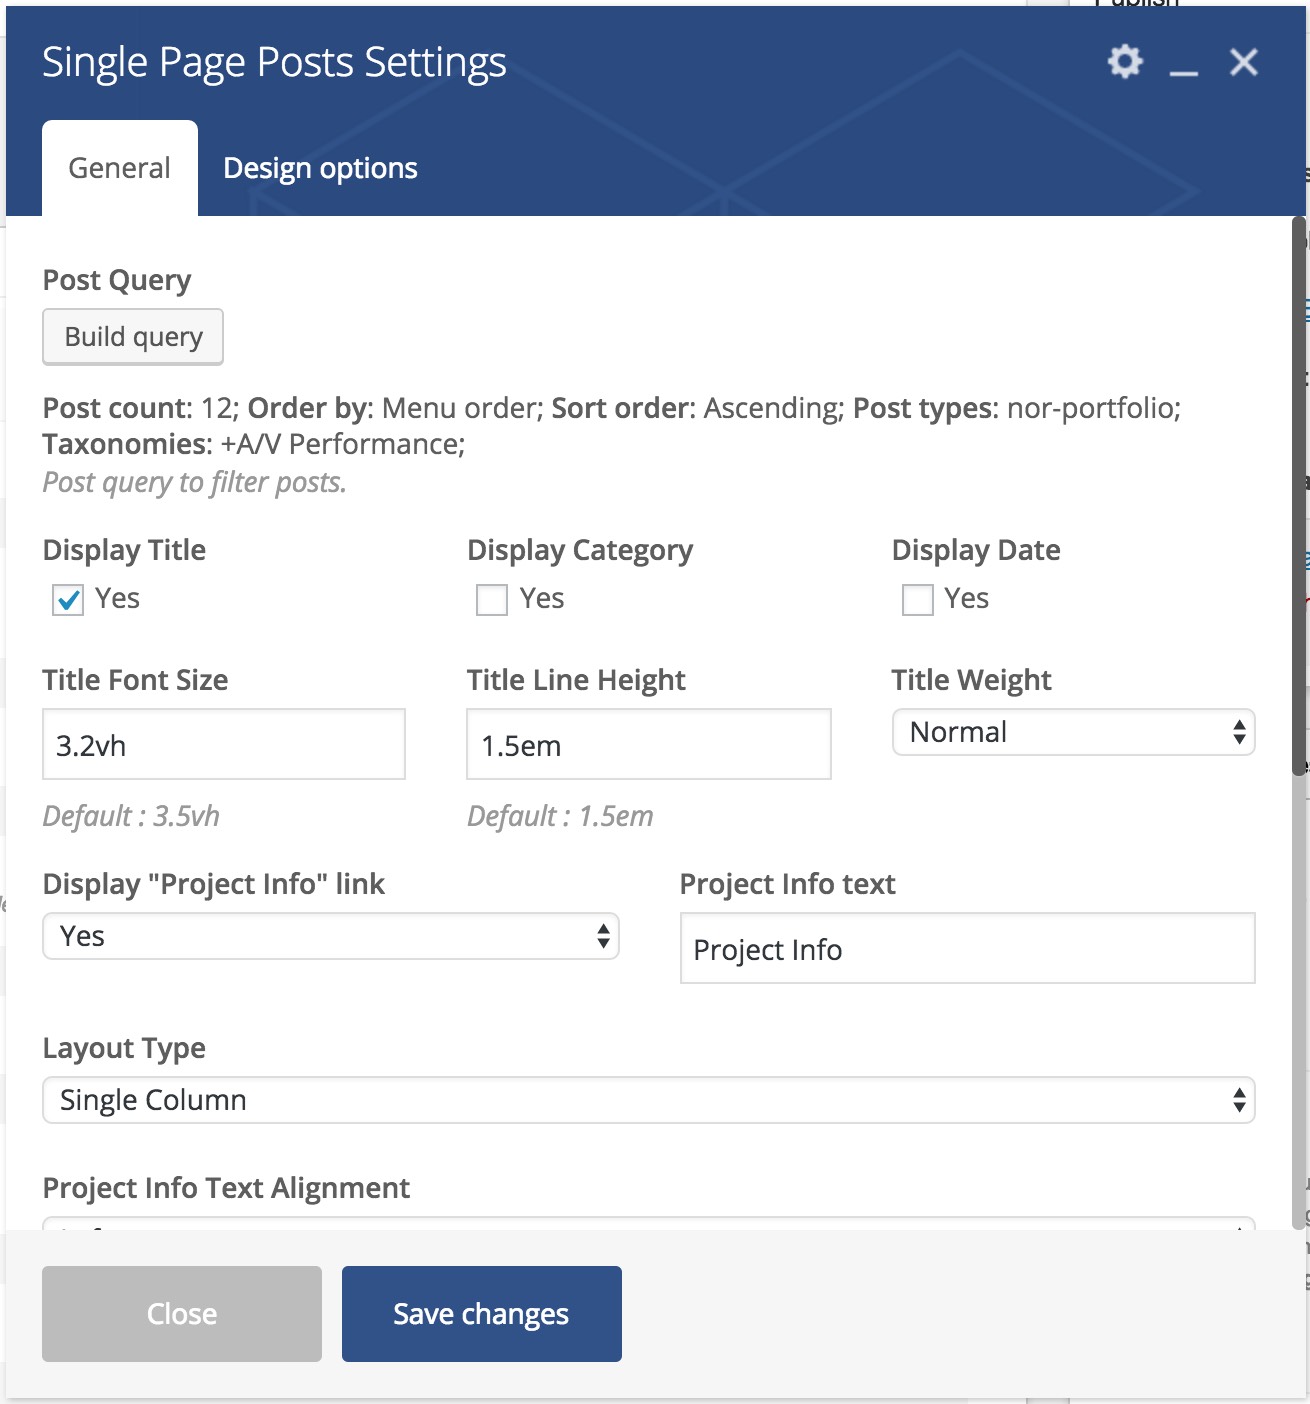
Navigation
You can use IDs to navigate between sections using the top navigation menu (Appearance > Menus) instead of relying on the default single navigation dots (displayed on the right).
Edit Row
To set an ID for a row, click the Edit button in the row settings.

Add an ID
Set an ID in the Row Settings. Make sure the ID does not contain spaces or invalid characters.
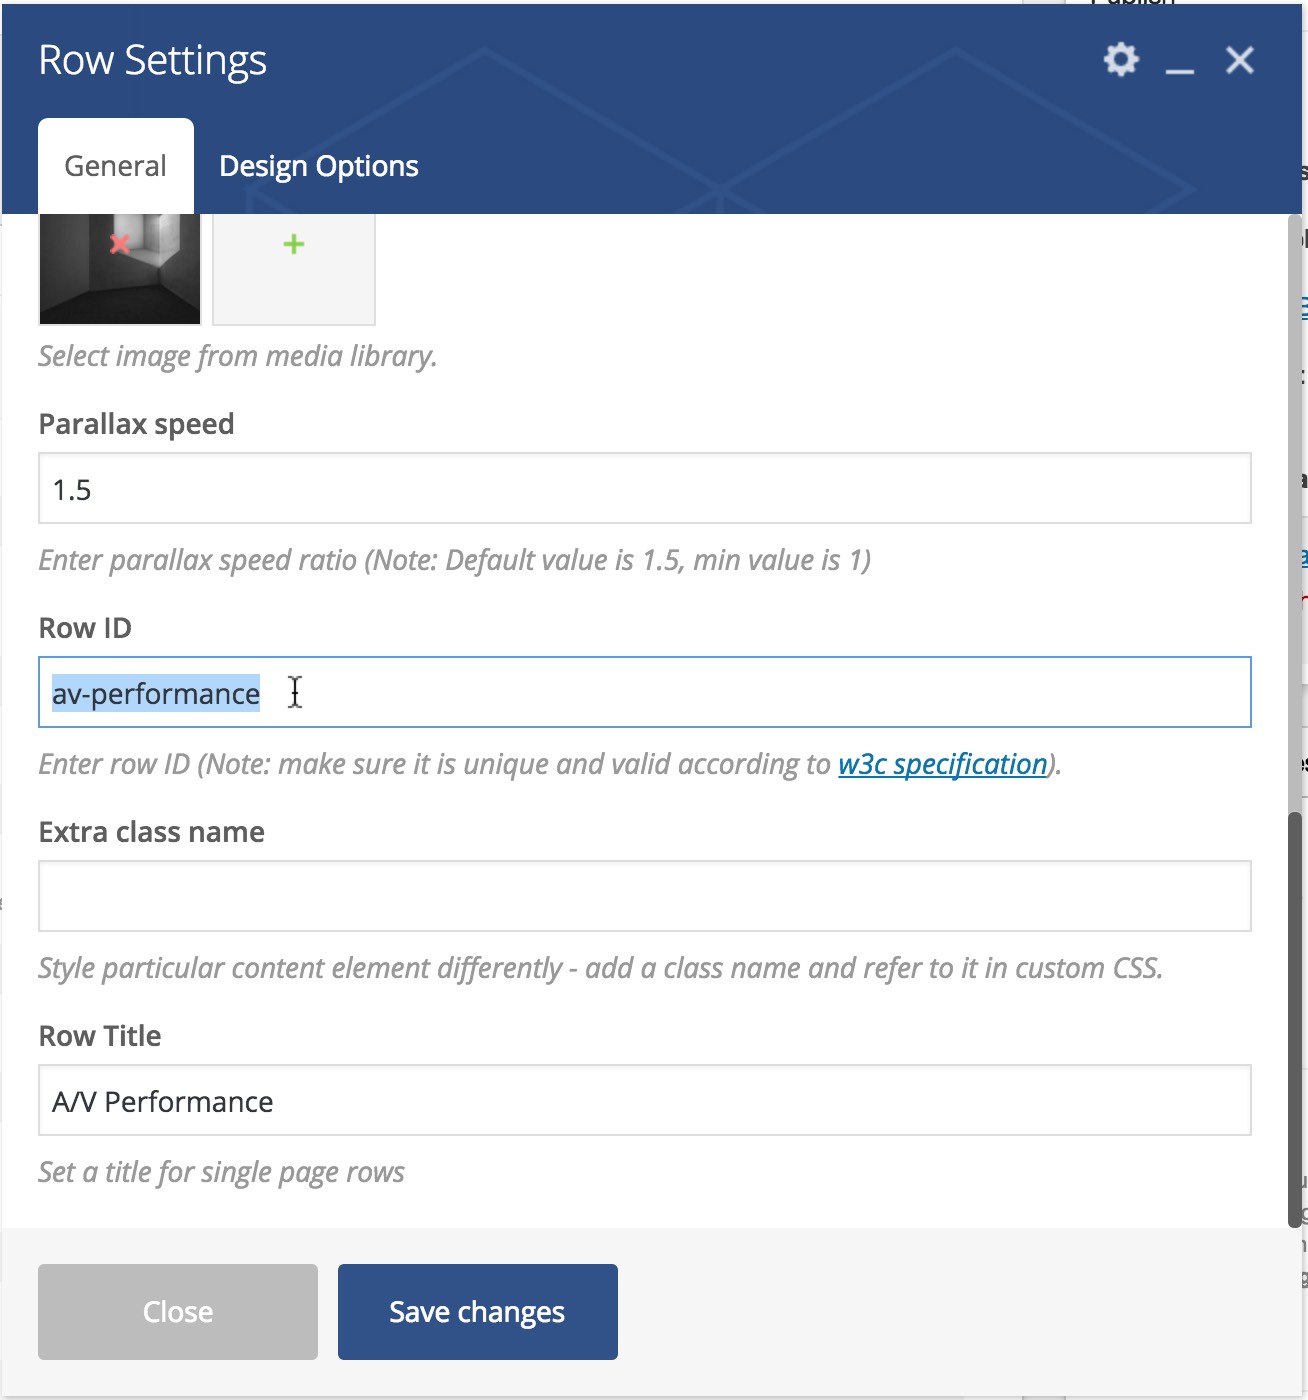
Add a Menu Item
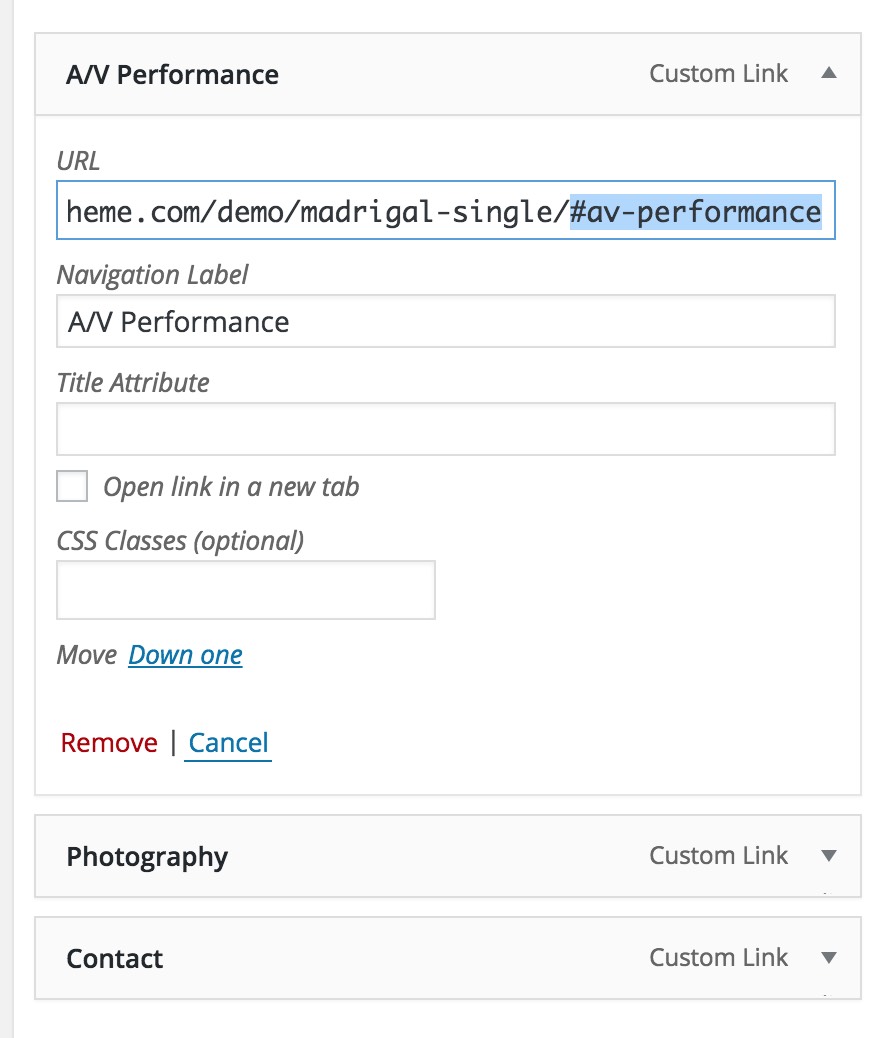
Go to Appearance > Menus and add a new menu item. If you don’t have a menu, create one first.
Add a Link
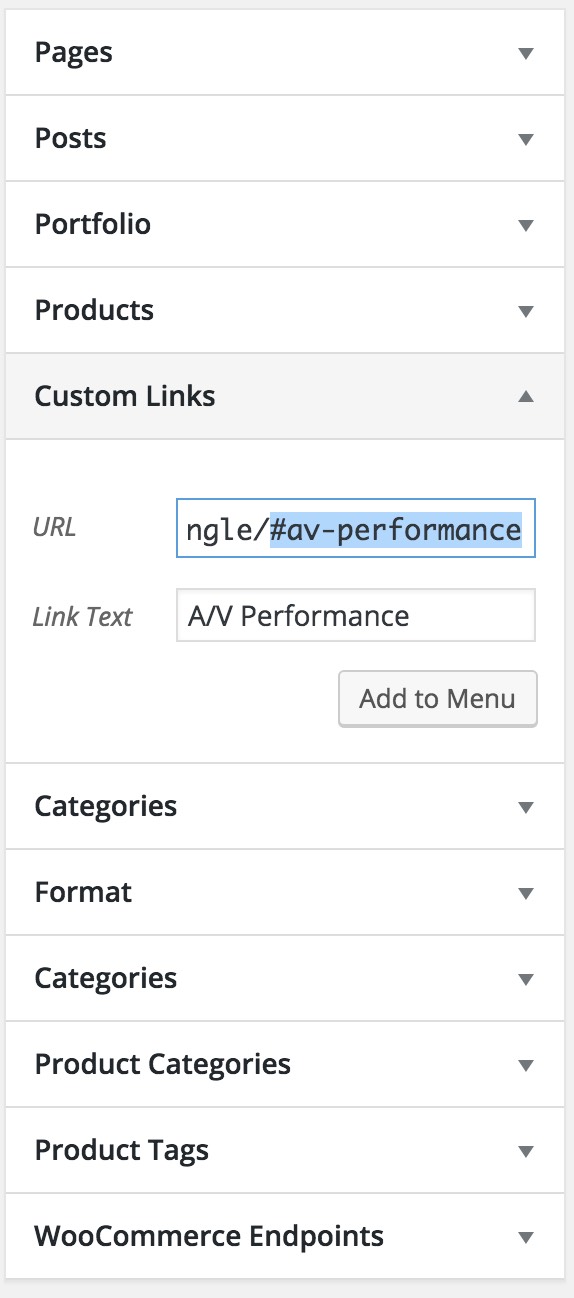
Select Custom Link and add your website URL followed by the ID with a hashtag.
For example: https://northeme.com/demo/madrigal-single/#av-performance
Here, #av-performance is an example ID assigned to a row.
