Theme Installation
If you’ve already installed WordPress, sign in to northeme.com and navigate to the My Account page to download your theme.
The My Account page lists the themes you’ve purchased. Click the Download button to access theme-related files and documentation.
From the menu, select Download Theme File to download the theme as a zip file. The Theme License / Product Key, which will be required during setup, is also located in the Download menu.
WordPress Theme Installer (Recommended)
The most convenient way to install your theme is through the WordPress Theme Installer.
Step 1: Upload Theme
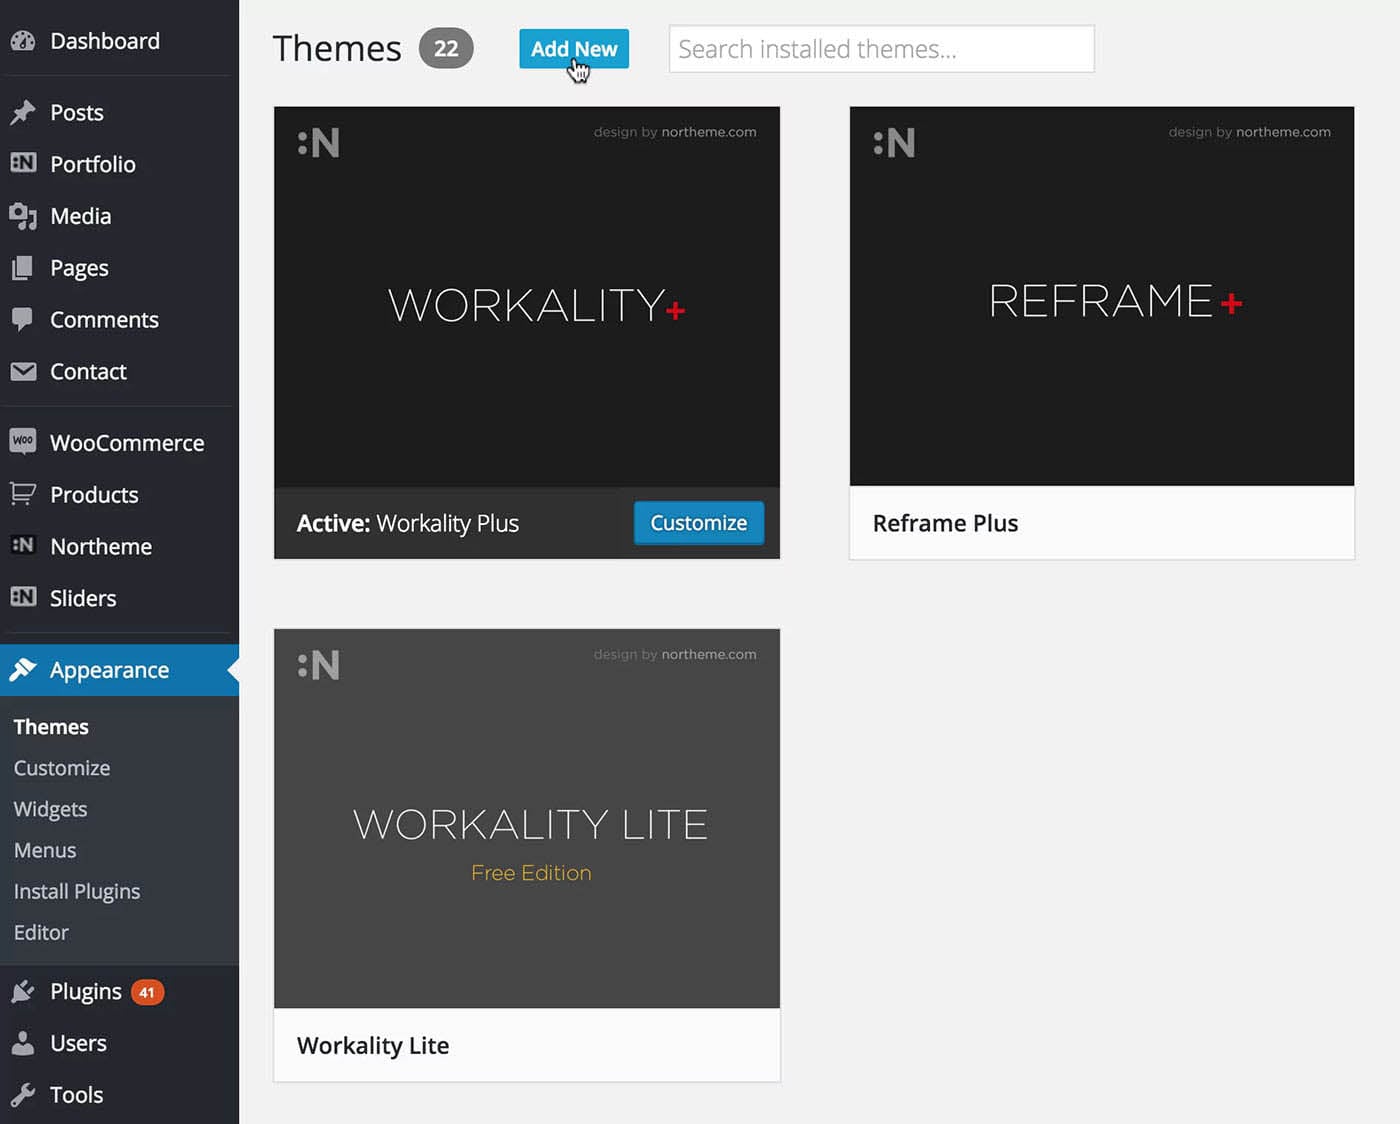
Sign in to your WordPress admin area and navigate to Appearance > Themes. Here, you’ll see a list of currently installed themes. Click the Add New button located near the Themes title.
Step 2: Install Theme
On the next page, you’ll see a selection of free themes provided by WordPress, along with an Upload Theme button for custom themes. Click Upload Theme and select the theme zip file you downloaded from the My Account page.
Step 3: Activate Theme
Once the theme is installed, you need to activate it to start using it. Return to Appearance > Themes, where your theme should now appear in the installed themes list. Simply click Activate to finalize the installation.

Installing via FTP (Alternative)
If you encounter issues with the WordPress Theme Installer, such as file upload size limits imposed by your hosting provider, you can install the theme via FTP instead.
Step 1: Obtain FTP Credentials
To begin, you’ll need your web hosting’s FTP credentials. If you’re unsure of these details, contact your hosting provider for assistance.
Step 2: Connect via FTP
Next, use an FTP client to access and browse your website’s files. We recommend FileZilla, a free and multi-platform FTP client.
Step 3: Upload Theme
After connecting to your website via FTP, navigate to the wp-content/themes directory. Extract the downloaded theme zip file and upload the unzipped theme folder to this directory.
Step 4: Activate Theme
Once the upload is complete, go to Appearance > Themes in your WordPress admin dashboard. Your theme should now appear in the installed themes list. Click Activate to finalize the installation.
Good to know: Installing via FTP may require setting file permissions to
755 (read/write). Refer to the WordPress Help
Guide
for more information.
Note: For additional guidance on installing themes, see the WordPress Documentation. If you’re unsure about any part of the process, your hosting provider may be able to assist you with the installation.